
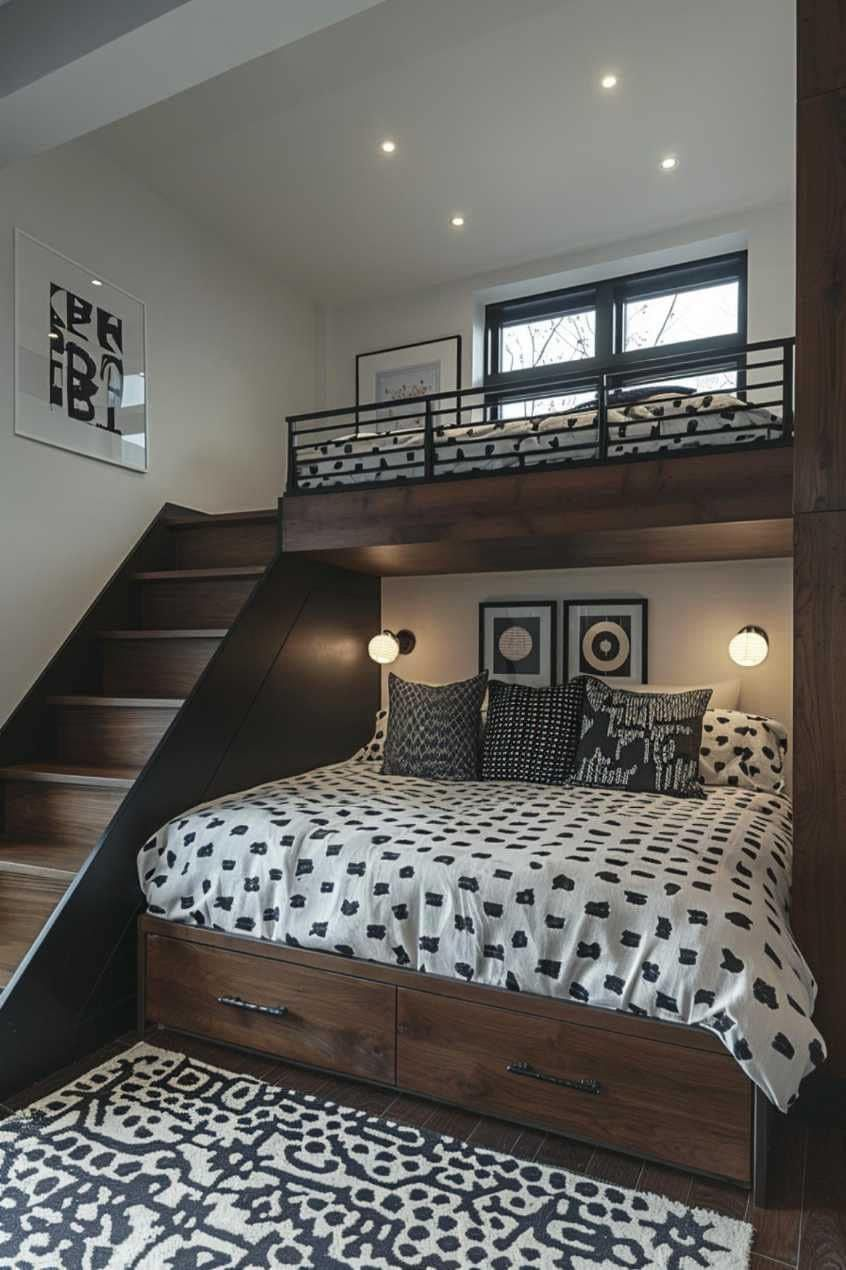
The first summer my family rented a lake house with a “bunk room,” it was four sad metal frames crammed into a room the size of a walk-in closet, no reading lights, one shared outlet, and a ladder that felt like it was going to give out under my cousin every single time he climbed it.
It slept six people technically. It slept nobody comfortably.
That trip is basically the reason I’ve spent way too many hours since then looking at how the good bunk rooms — the ones that actually work for a full week of cousins, in-laws, and overtired kids — get built.
A lake house bunk room has one job that’s different from a regular guest room: it needs to sleep a lot of people, often mixed ages, often for multiple nights in a row, without anyone plotting their escape by day two.
That means the stuff that’s optional in a normal bedroom — good reading lights, actual storage per person, some kind of privacy, ventilation that doesn’t turn the top bunk into a sauna — becomes non-negotiable here.
This list covers the full range, from small lake cabin bunk nooks that sleep four to bigger multi-bunk rooms built for a full extended-family week, plus the practical stuff most design roundups skip entirely, like what ladder angle is actually safe and what mattress thickness stops adults from hitting their heads on the bunk above.
1. Built-In Wall-to-Wall Bunks
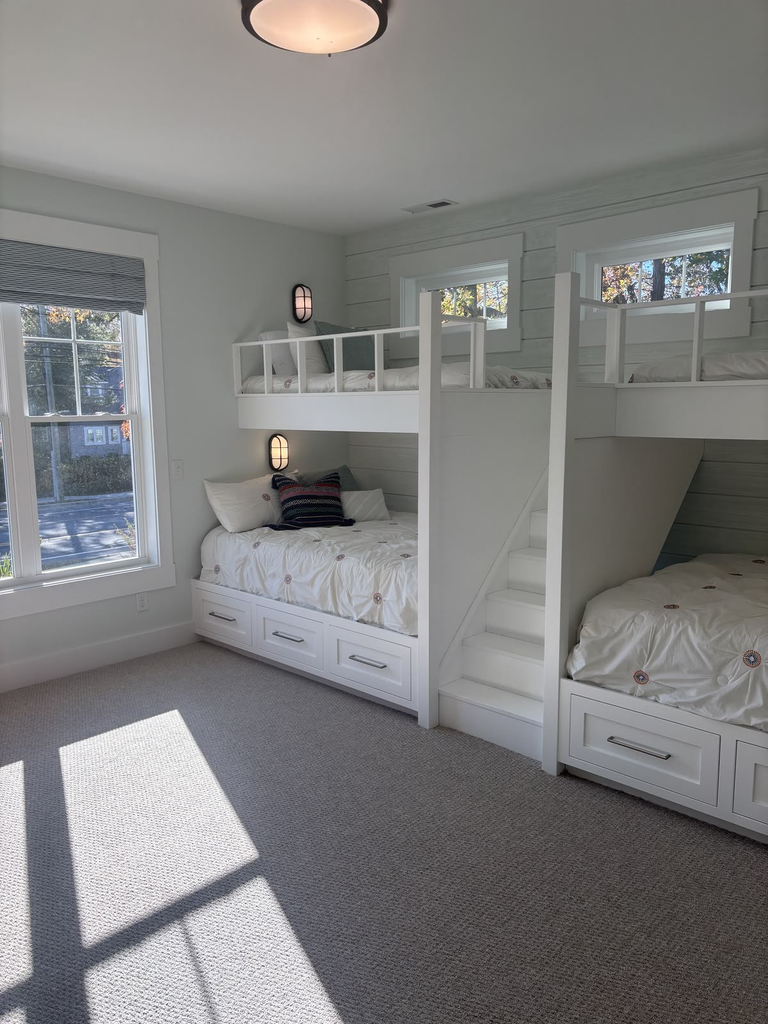
Why it works: built-in bunks (framed directly into the wall structure rather than freestanding beds) use the room’s full width efficiently and, done right, feel more like a piece of the house than furniture that could tip or shift, which matters a lot with kids climbing in and out.
How to do it: work with a contractor or experienced carpenter on load calculations if you’re stacking more than two beds high, and plan the framing around your actual mattress sizes before cutting anything, since a lot of DIY builds end up with mattresses that are a half-inch too snug and impossible to strip for sheets.
Pro tip: leave at least 30 inches of vertical clearance between the mattress top of one bunk and the bottom of the one above it — anything less and adults genuinely can’t sit up without hitting their head, which becomes a real problem on rainy days when everyone’s stuck reading in bed.
2. Twin-Over-Full Bunk Combo
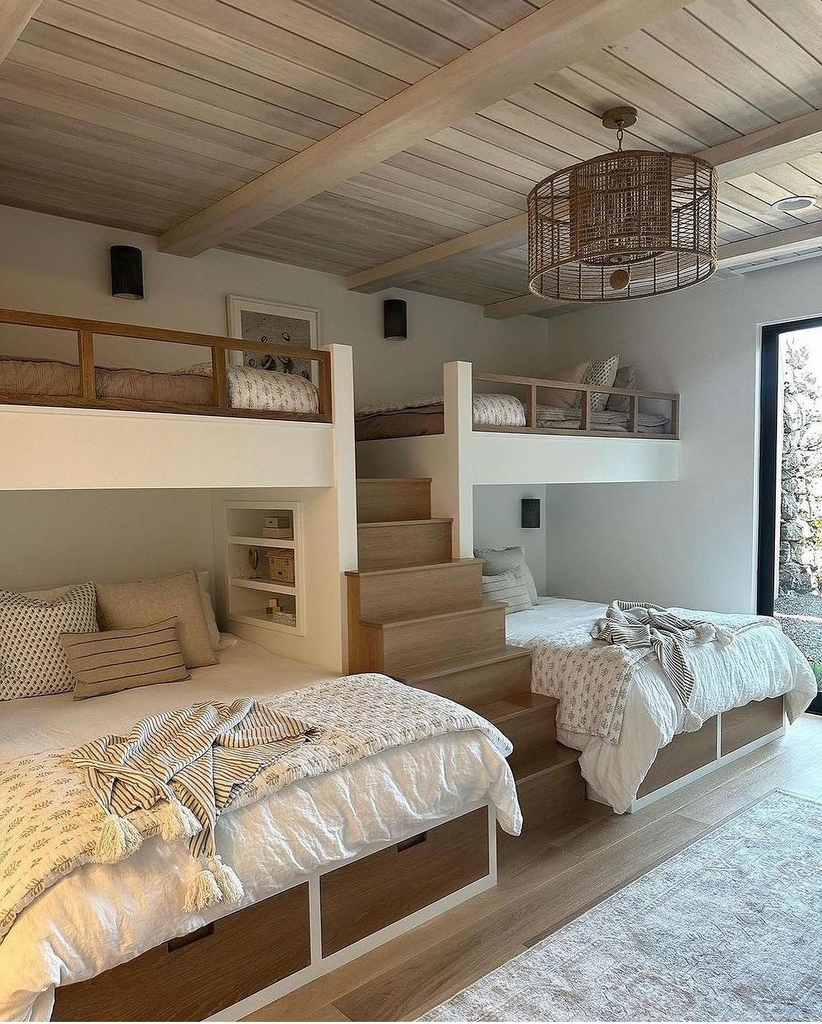
Why it works: a straight twin-over-twin setup wastes potential capacity if you’re regularly hosting a parent-and-toddler pair or two adults who’d rather share a bottom bunk than take two separate beds — a twin-over-full gives you that flexibility without adding a whole extra bed frame to the room.
How to do it: put the full-size mattress on the bottom for structural and practical reasons (easier to get in and out of, easier for anyone who can’t manage a ladder), and keep the twin up top.
Pro tip: double-check your ladder placement with this configuration specifically — a full-size bottom bunk is wider than a twin, so a ladder mounted for a standard twin-over-twin setup often ends up positioned awkwardly, either blocking part of the bottom bed or sitting too far to one side to feel secure.
3. Built-In Bunk Nook with Curtains
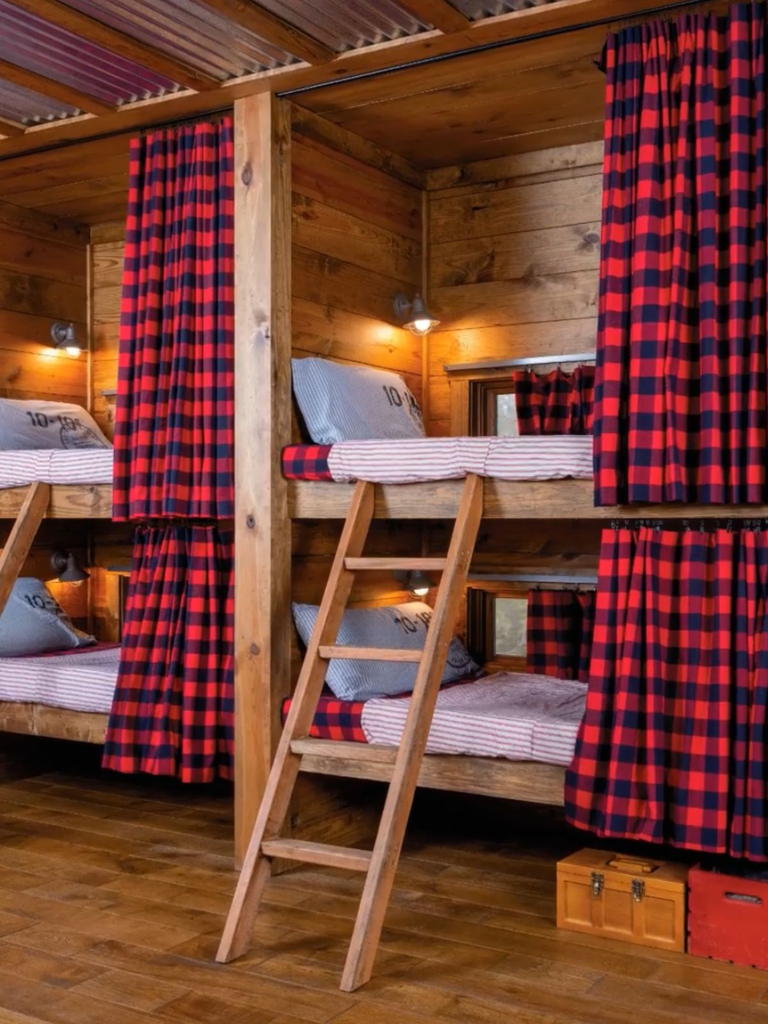
Why it works: adding a curtain track to each individual bunk gives every sleeper their own enclosed, private little space — genuinely useful when you’ve got mixed-age groups or people going to bed at different times, since one person can read with a headlamp behind a closed curtain without disturbing the room.
How to do it: use a flexible curtain track (the kind that curves around a nook opening) rather than a straight rod, and pick a blackout-adjacent fabric if any of your bunk sleepers are on a different sleep schedule than the rest of the house — teenagers sleeping in, early-riser grandparents, whoever it is.
Pro tip: my friend Marisol added curtains to her lake house bunks specifically because her kids kept fighting about the top bunk “seeing” the bottom bunk when they wanted privacy to change clothes — it fixed the fighting almost entirely, which she said she wasn’t expecting from something that felt like a purely aesthetic choice at the time.
4. Four-Bunk Corner Configuration (L-Shape)
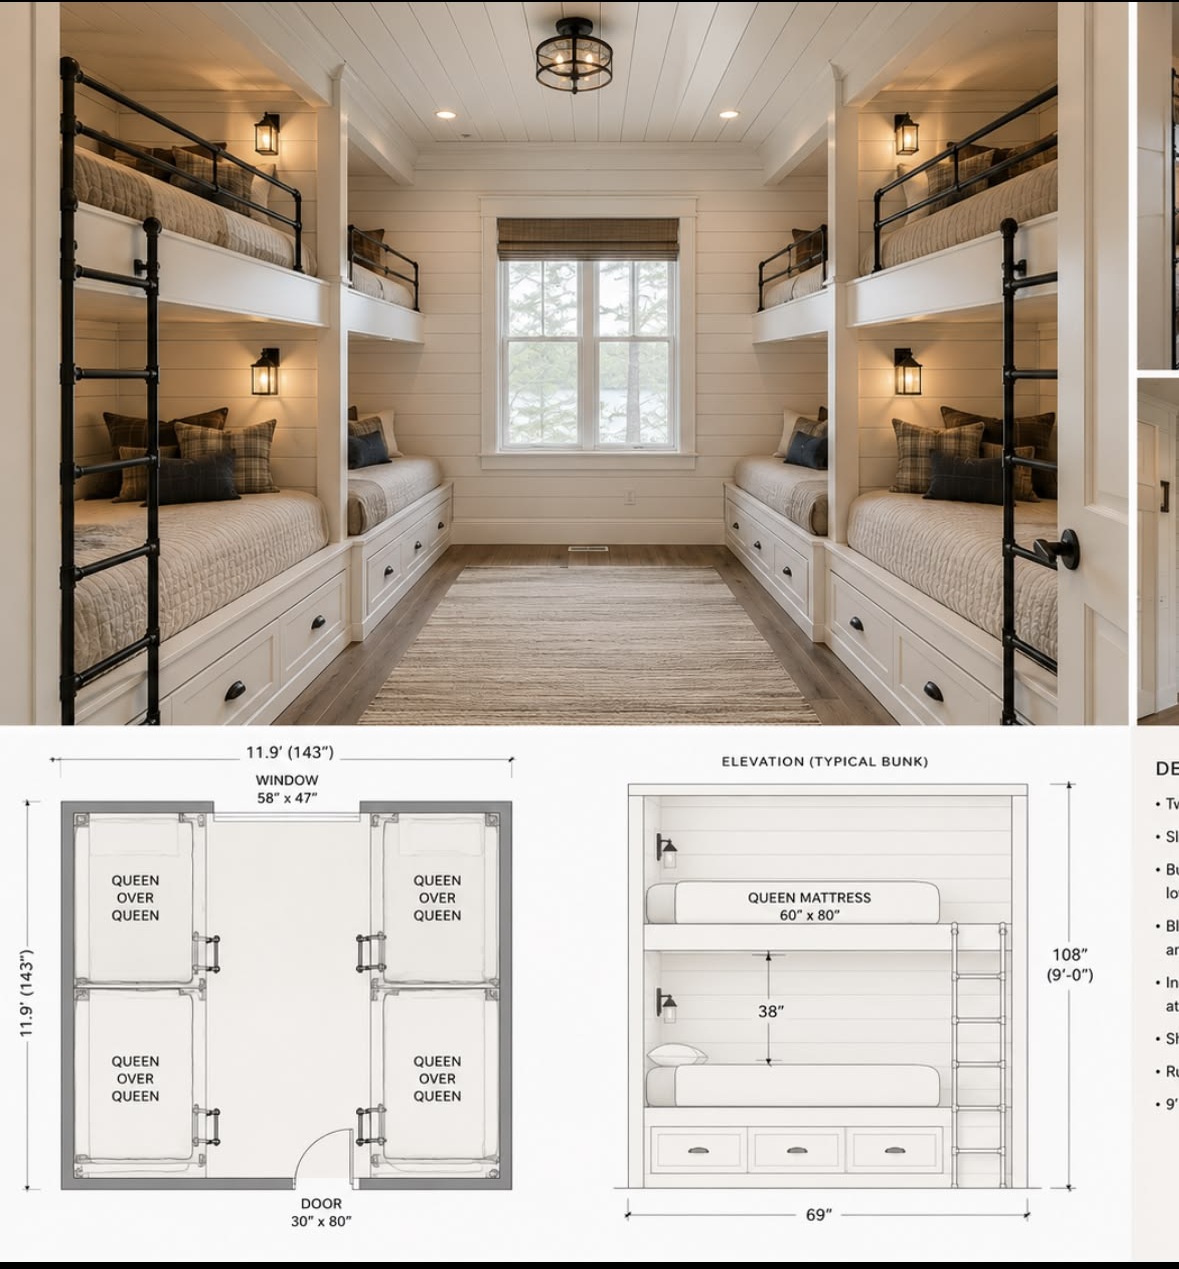
Why it works: instead of lining bunks along one wall, arranging two sets in an L-shape around a corner sleeps the same number of people in a room that’s roughly square rather than long and narrow, which opens up more usable floor space in the middle for a rug, a small table, or actual walking room.
How to do it: this configuration needs slightly more total wall footage than a straight line does, so measure both walls of your corner carefully — a lot of L-shaped bunk plans I’ve seen fall apart because someone assumed the two walls were symmetrical when they weren’t.
Pro tip: keep the two bunk sets at slightly different heights or configurations if the room allows it (say, one twin-over-twin and one twin-over-full) — it avoids the barracks feeling that a perfectly symmetrical, identical-on-both-sides bunk room can get, and it also just gives you more sleeping-arrangement flexibility.
| Configuration | Sleeps | Best For | Floor Space Used |
|---|---|---|---|
| Wall-to-wall built-in | 4-6 | Long, narrow rooms | Low |
| Twin-over-full combo | 3-4 | Mixed adult/kid groups | Medium |
| L-shape corner | 4-6 | Square rooms, need open middle space | Medium |
| Freestanding stackable | 2-4 per unit | Flexible/rental properties | Medium-High |
| Loft-style single bunk | 1-2 + space below | Small cabins, need dual-purpose room | Low |
5. Freestanding Stackable Bunks
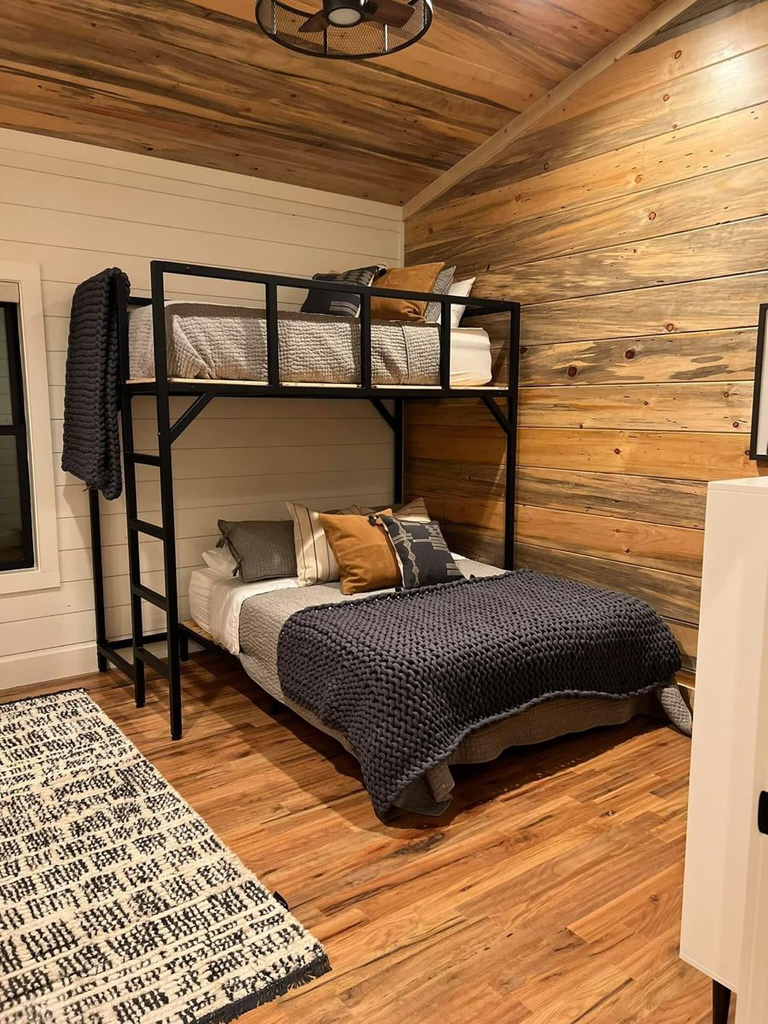
Why it works: if you’re not ready to commit to a built-in structure — especially relevant if you rent your lake house out and need to reconfigure between seasons — freestanding stackable bunk units give you nearly the same sleep capacity without any permanent construction, and they can be broken down or rearranged as your needs change.
How to do it: buy units rated for the actual weight of adult sleepers, not just kid-rated bunk sets, since a lot of budget freestanding bunks are only tested and warrantied for children’s weight limits even though lake house guests are frequently adults.
Pro tip: check the floor under a freestanding bunk before you commit to a layout — these units concentrate weight on four legs rather than distributing it across a wall-mounted frame, and a soft or uneven older lake house floor can develop dips under stackable bunk legs over a few seasons if you don’t add some kind of load-spreading base or pad.
6. Loft-Style Single Bunk Over Storage or Seating
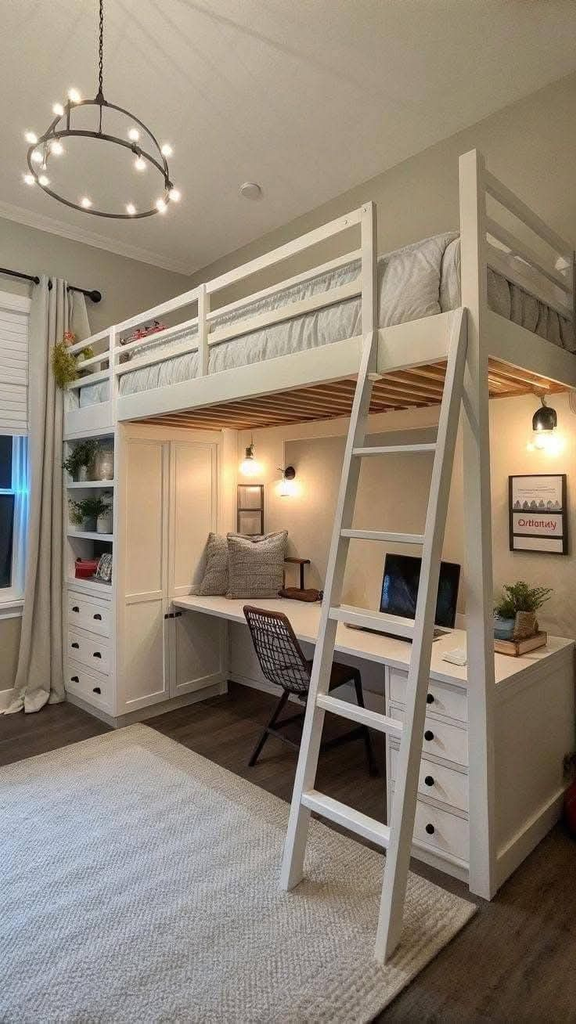
Why it works: not every lake house bunk room needs four beds — a single loft bed with a desk, bench, or storage built into the space underneath makes sense in a smaller room where you want one extra sleeping spot without dedicating the whole room to bunks.
How to do it: build or buy the loft frame first, then design what goes underneath around your actual clearance height (you generally want at least 48-54 inches under the loft bed if you’re putting a sitting or desk area there, more if it needs to be a fully standing space).
Pro tip: this is a smart pick for a lake house office or playroom that occasionally needs to double as extra sleeping space during a full house — it gets you a genuine second-use room instead of a bunk room that sits empty most of the year.
7. Ladder vs. Built-In Stairs: The Access Question
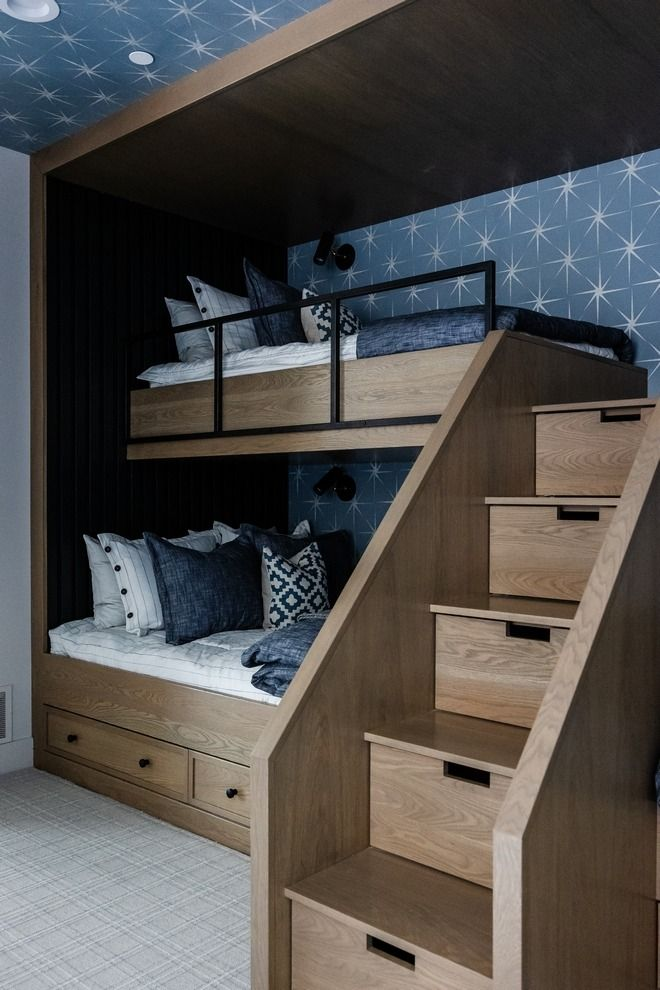
Why it works: this is the detail almost every bunk room post skips, but it matters more than the bed configuration itself — a straight ladder is more space-efficient and cheaper, but built-in stairs (often with storage drawers built into each step) are meaningfully safer, especially for younger kids or anyone getting up in the middle of the night.
How to do it: if you’ve got the floor space, built-in stairs with a handrail are worth the extra footprint for any bunk room that regularly sleeps kids under 10 or anyone with mobility concerns — the wider, flatter steps and the handrail make a real difference over a wobbly ladder rung.
Pro tip: whichever you choose, angle matters. A ladder or stair pitched too steeply (closer to vertical than a real staircase angle) is the single biggest bunk room safety complaint I hear about, and it’s often the result of trying to save floor space rather than a deliberate design choice — don’t sacrifice a safe pitch angle to gain a few inches of room.
8. Under-Bunk Drawer Storage
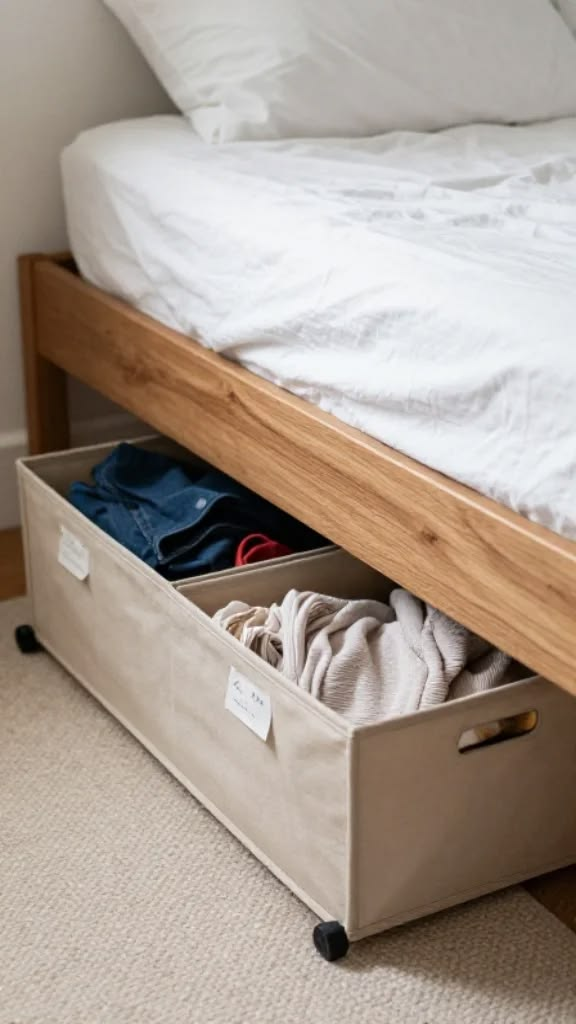
Why it works: a bunk room sleeping four to six people for a week needs real per-person storage, and building drawers into the base of the bottom bunk (rather than relying on a shared dresser across the room) gives each sleeper — even the top bunk person — a defined spot for their stuff without the room turning into a pile of open suitcases.
How to do it: size drawers to actual suitcase and duffel dimensions rather than generic dresser drawer sizes, since lake house guests are usually living out of a bag for the week, not unpacking into hanging storage.
Pro tip: label or color-code drawers per bunk if you’re hosting the same group year after year — it sounds small, but it cuts down on the “whose sock is this” chaos that happens fast in a room with four or six people sharing space for a week.
9. Individual Reading Lights Per Bunk
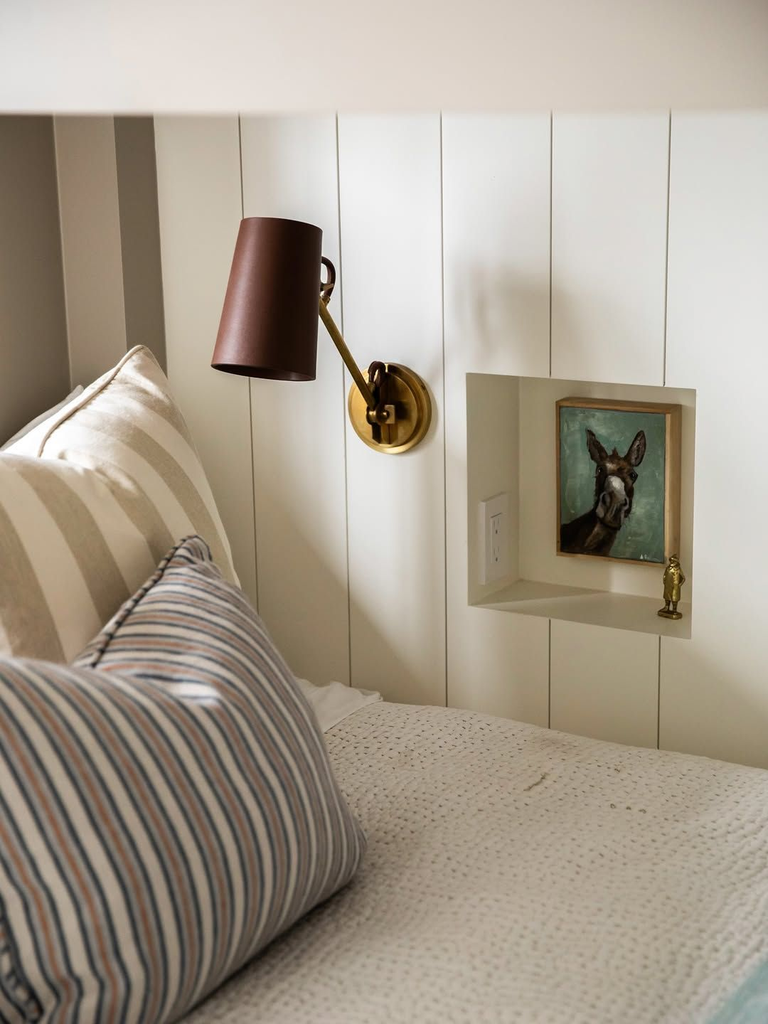
Why it works: a single overhead light in a bunk room means either everyone’s awake or everyone’s in the dark, which doesn’t work for a mixed group of early sleepers, night owls, and kids who want ten more minutes of a book.
Individual, bunk-mounted reading lights solve this completely and are one of the cheapest upgrades on this entire list relative to how much it improves the room.
How to do it: use battery-powered or USB-rechargeable clip lights if you’re not ready to run new wiring, or hardwire small LED sconces into the wall beside each bunk if you’re doing a fuller renovation — either works, but skip anything that requires a cord running across the bed itself, which becomes a tangling and safety issue fast.
Pro tip: pick warm-toned LEDs, not cool white ones, for bunk reading lights specifically — cool white light in a small enclosed bunk space reads more clinical than cozy, and it’s a detail that’s easy to get wrong if you’re just grabbing whatever clip light is cheapest.
10. Ventilation and Ceiling Fan Placement
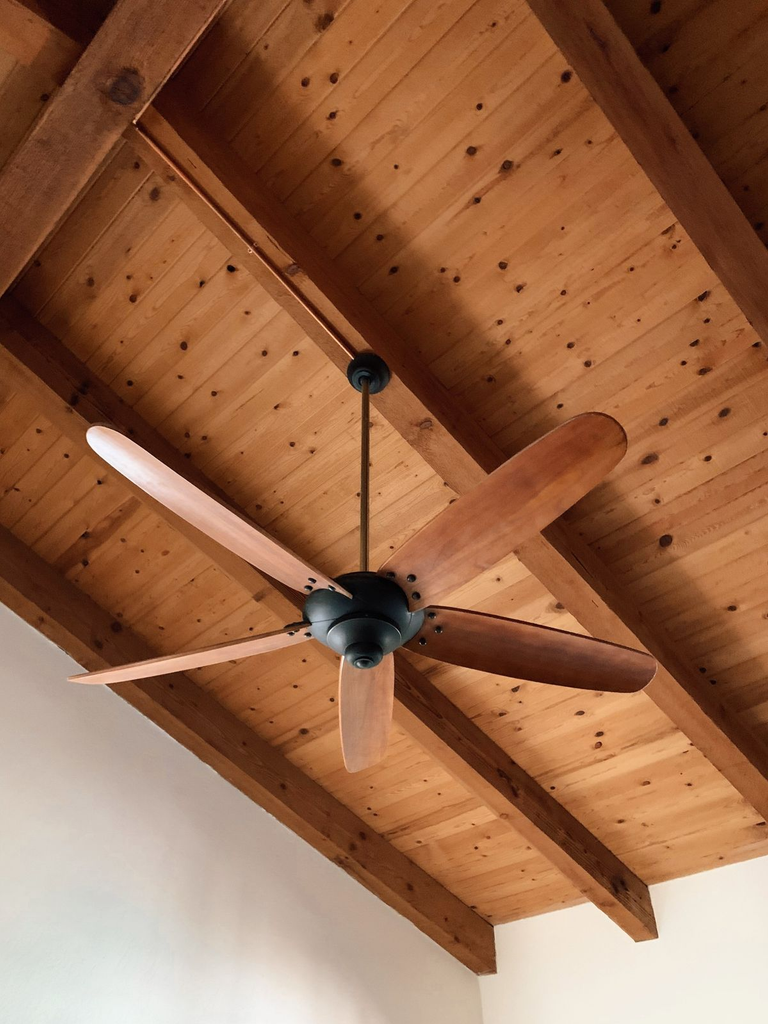
Why it works: heat rises, which means the top bunk in a room without good airflow is reliably the warmest, stuffiest spot in the house — and it’s usually the kids who end up there, which means the people least equipped to just deal with it are the ones most affected.
How to do it: a ceiling fan set on a low, steady speed does more for a bunk room’s comfort than most other upgrades on this list, and if your bunk room doesn’t have one, it’s worth prioritizing before furniture or decor.
Pro tip: check your top bunk’s clearance to the ceiling before installing a fan — you need real distance between the top of that mattress and any moving fan blade, and in a lot of built-in bunk rooms with lower ceilings, a standard ceiling fan simply doesn’t have safe clearance, so a low-profile or wall-mounted fan option is the safer call.
11. Nautical or Lake-Themed Bunk Room (Done Well, Not Kitschy)
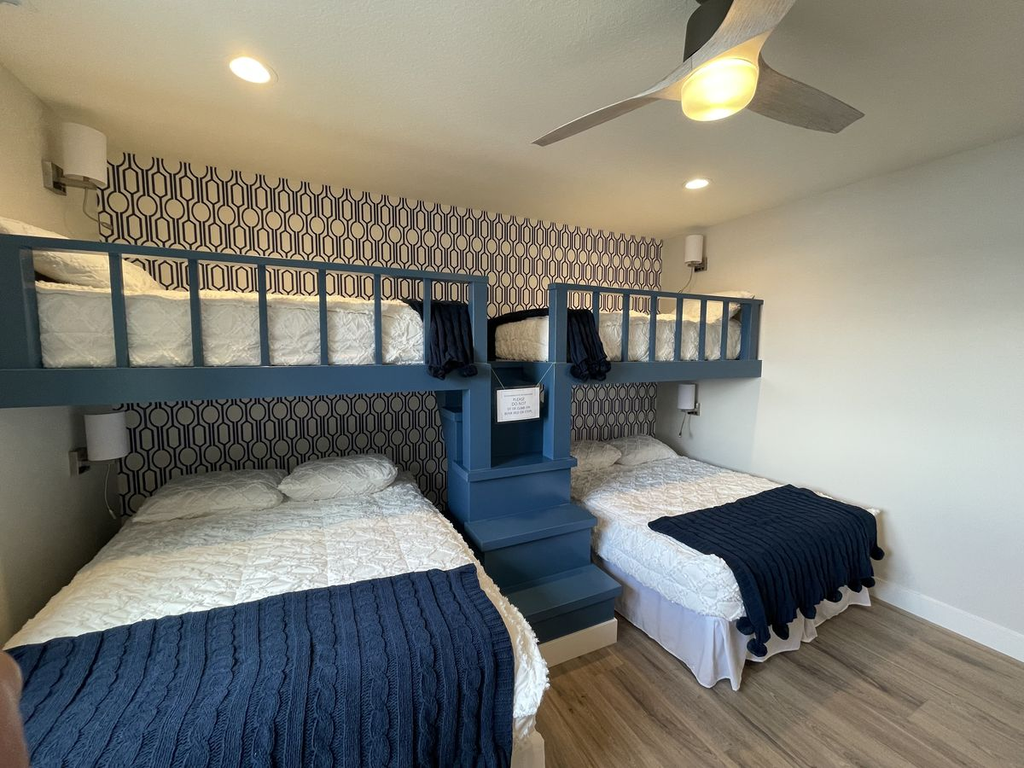
Why it works: leaning into a lake or nautical theme is an obvious choice for this kind of room, but there’s a real difference between doing it well — a genuinely cohesive color story and a few well-chosen pieces — and doing it in a way that reads like a gift shop, which is the version most people actually end up with.
How to do it: pick two or three colors max (navy, white, and one accent like a warm wood tone or a muted red) and repeat them across bedding, trim, and one or two accessories, rather than layering anchor motifs, rope details, and boat art all in the same room.
Pro tip: skip the rope bed frame or rope railing accents if you’re building this for actual regular use — they look great in photos, but rope hardware tends to fray, loosen, and generally not hold up to years of kids climbing on and off bunks the way a solid wood or metal frame does.
12. Neutral, Design-Forward Bunk Room (No Theme)
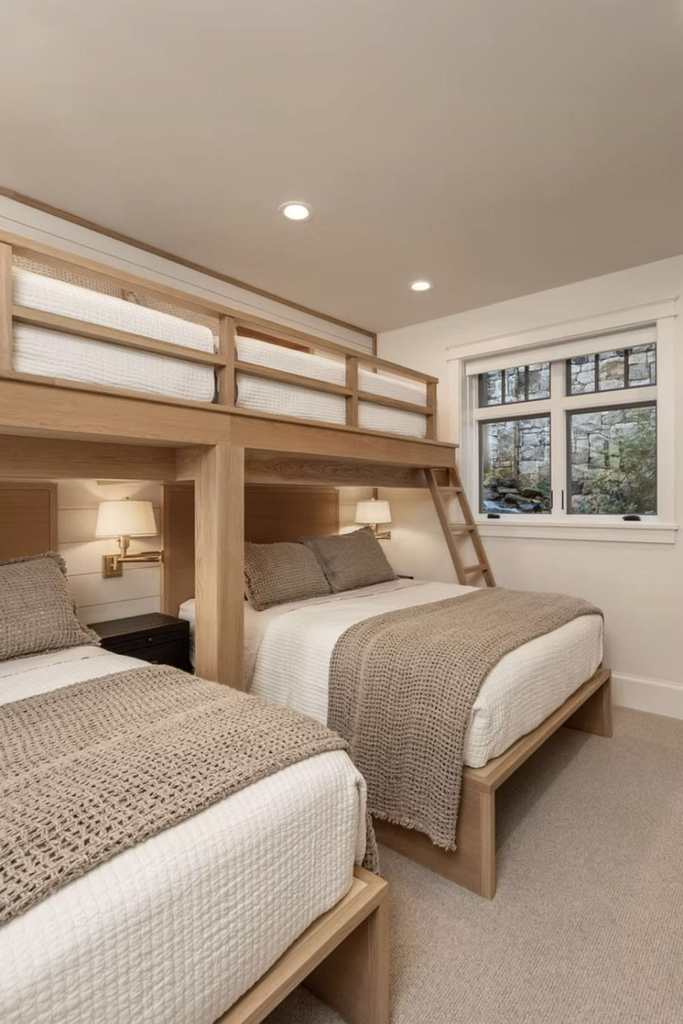
Why it works: if you’re not into the lake-themed look, a neutral bunk room — natural wood tones, simple white or cream bedding, minimal decor — ages better over time and doesn’t compete with the actual view most lake houses are built around, letting the windows and the setting do the visual work instead of the walls.
How to do it: lean on texture instead of color for interest — a woven blanket, a natural fiber rug, varied wood grain on the bunk frame itself — since an all-neutral room with no texture variation can read as flat or unfinished rather than calm.
Pro tip: this style photographs better for a rental listing if that’s relevant to you — neutral bunk rooms tend to appeal to a broader range of renters than a heavily themed room does, since not every guest wants to sleep surrounded by a specific aesthetic that isn’t their own.
13. Bunk Room with a Shared Reading/Hangout Nook
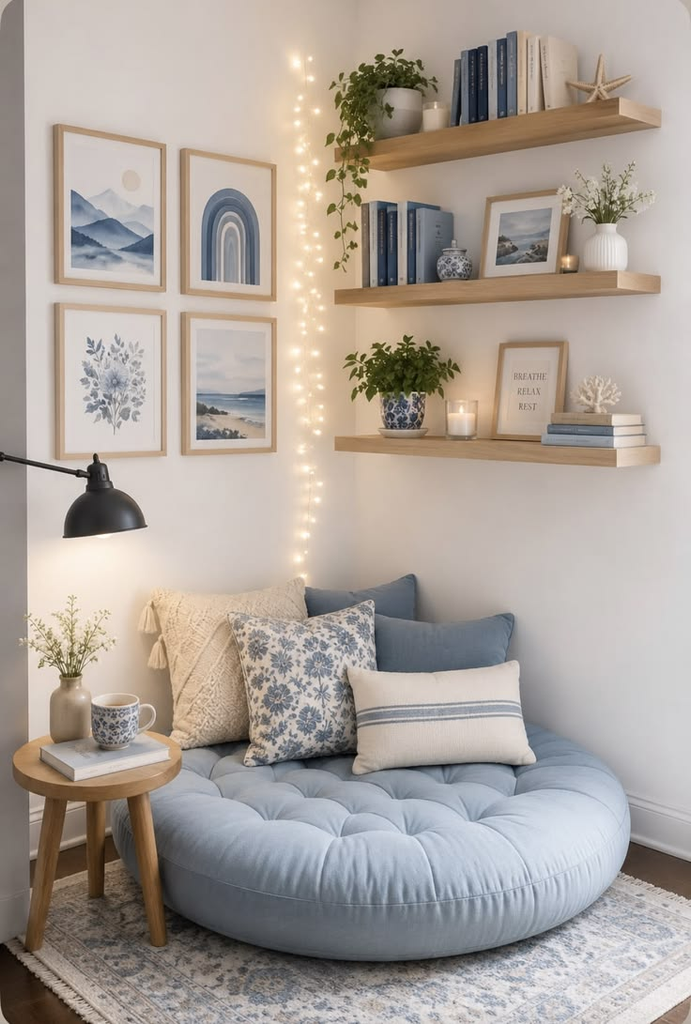
Why it works: if the room’s big enough, carving out a small shared seating area — a window bench, a couple of floor cushions, even just a small rug with floor pillows — gives the bunk room somewhere to actually hang out during the day, not just sleep, which matters on a rainy lake house day when everyone’s stuck inside.
How to do it: keep this zone genuinely separate from the sleeping area, even if it’s just a rug boundary or a change in flooring, so it reads as its own space rather than clutter around the beds.
Pro tip: this is a good spot for a small bookshelf stocked with actual books rather than decorative ones — a bunk room that doubles as a rainy-day hangout gets a lot more use if there’s something to actually do in it beyond sleep.
14. Color-Coded Bunk Assignments
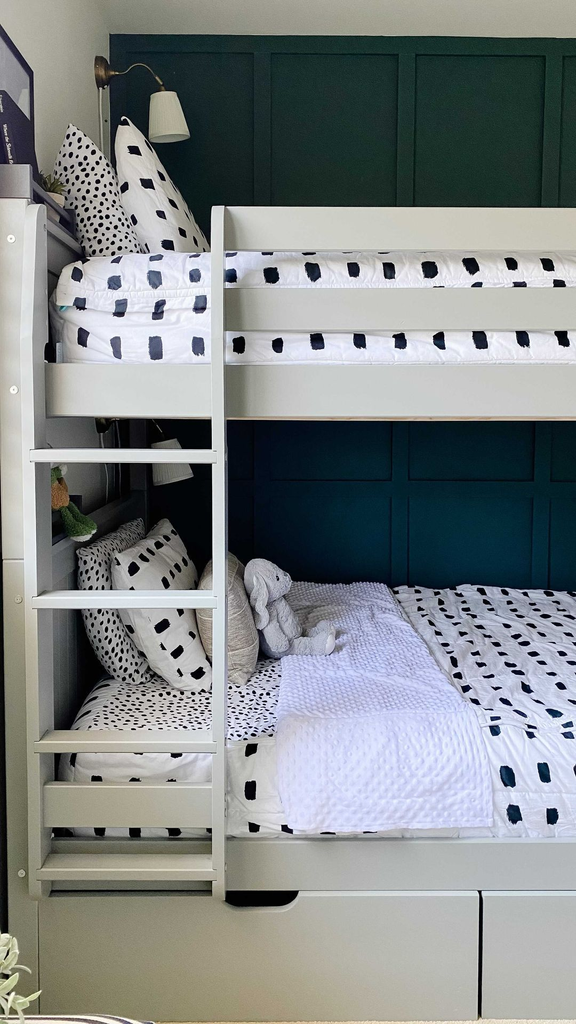
Why it works: in a room with more than two bunks, giving each bed its own accent color (through bedding, a pillow, or even just a labeled hook) cuts down on the nightly “whose bed is this” negotiation, especially with kids or with a group that returns to the same lake house year after year and has informal but strongly held bunk preferences.
How to do it: pick your color-coding through something easy to change seasonally — a colored throw pillow or a patterned duvet cover — rather than something permanent like painted bunk frames, so you’re not locked into the same assignments forever.
Pro tip: a reader once mentioned she uses colored carabiners clipped to each bunk ladder to mark “whose turn” it is for the coveted top bunk each summer, rotating year to year — it’s a small thing, but it turned an actual sibling argument into a running family joke instead.
15. Bunk Room with Attached Half-Bath
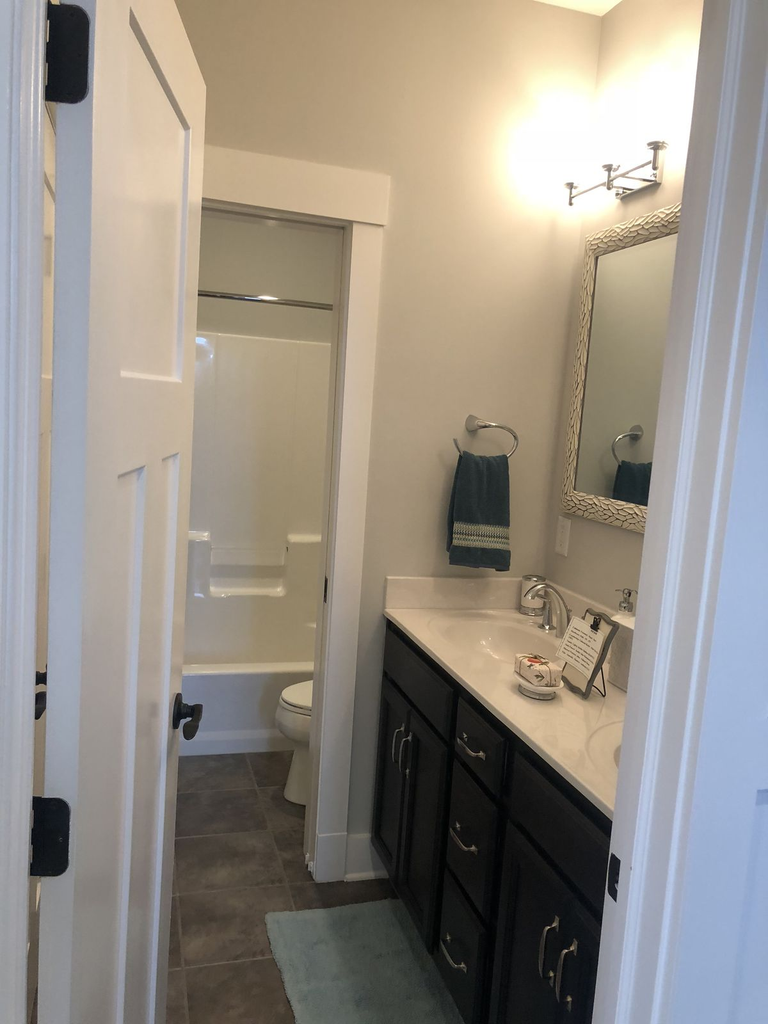
Why it works: for a bunk room sleeping four to six, a shared full bathroom down the hall creates real morning bottleneck problems, especially with kids — even a small attached half-bath (just a toilet and sink, not a full shower) meaningfully cuts down on the 7am hallway traffic jam.
How to do it: this is a bigger renovation than almost anything else on this list, since it usually means running new plumbing, so it only makes sense if you’re already doing a larger lake house renovation rather than a standalone bunk room refresh.
Pro tip: if a full attached bathroom isn’t in the budget, even a small hallway-adjacent sink station right outside the bunk room door solves a surprising amount of the morning bottleneck for a fraction of the plumbing cost.
16. Skylight or High Window Bunk Room
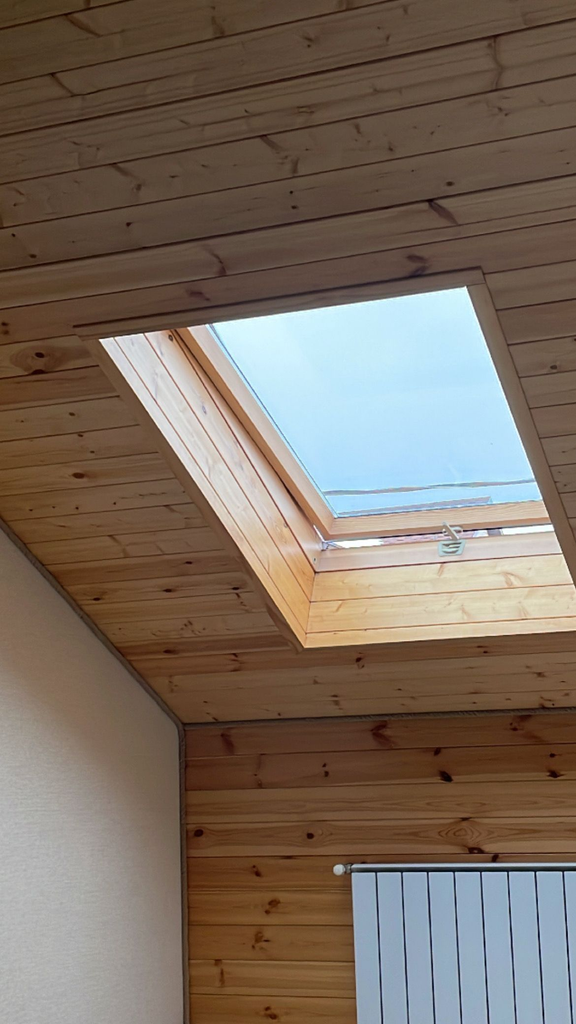
Why it works: bunk rooms are often tucked into smaller, sometimes windowless-feeling spaces (attic conversions, converted storage rooms), and adding a skylight or a high clerestory-style window brings in natural light without sacrificing any wall space to a standard window, which bunks usually need for the bed frames.
How to do it: this needs a contractor for the structural and roofing work involved, but it’s one of the highest-impact changes you can make to a bunk room that otherwise feels dark or cave-like.
Pro tip: add a blackout shade even to a skylight, especially if it faces east — a bunk room that gets direct morning sun through a skylight becomes a 6am wake-up call for everyone in the room, kids included, whether they’re ready to be up or not.
17. Bunk Room Rug Layering for Sound
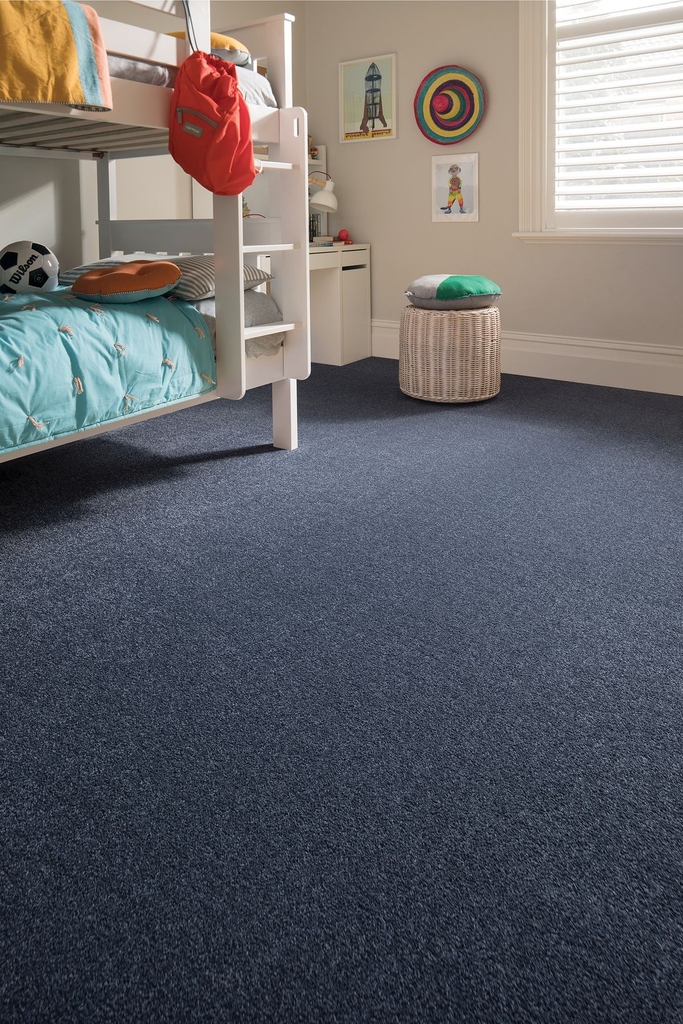
Why it works: this is a detail that gets overlooked constantly, but a bunk room with hard flooring and no rug is loud — every footstep, every dropped shoe, every middle-of-the-night bathroom trip echoes in a way that disrupts everyone else’s sleep, especially in a room with several people on different schedules.
How to do it: a full room-size rug does more here than a couple of small accent rugs, since you want sound dampening under the main walking path between the door and each bunk, not just decorative coverage in the middle of the room.
Pro tip: pick a low-pile, easy-clean rug material over anything plush or shag for a lake house specifically — wet swimsuits, sandy feet, and spilled drinks are a given in this kind of room, and a rug that’s hard to clean becomes a maintenance headache fast.
18. Bunk Room with a Built-In Charging Station
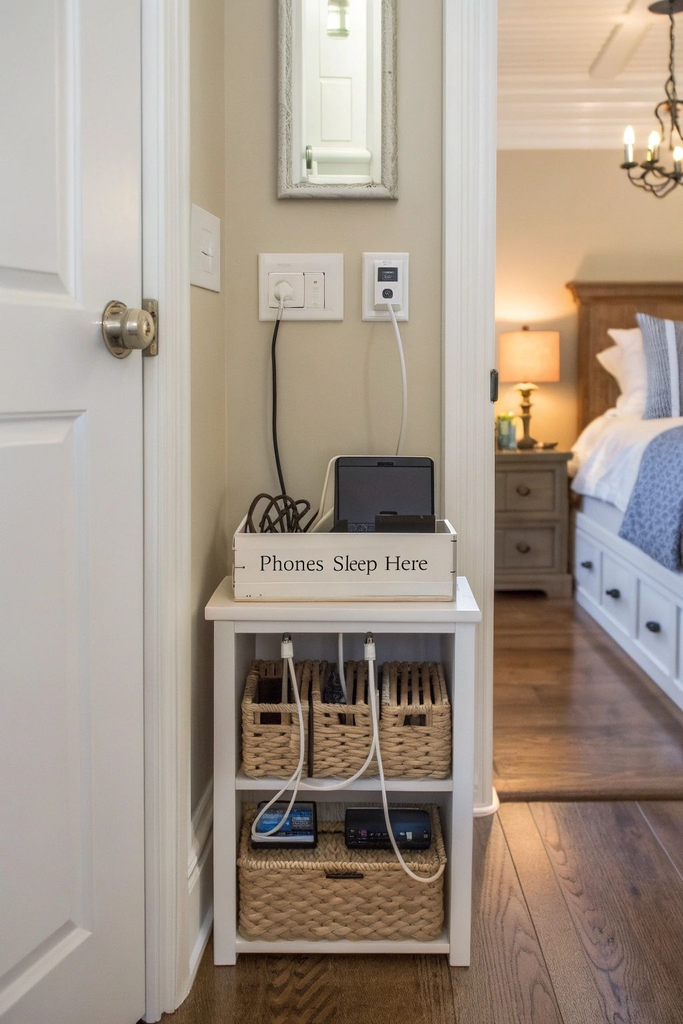
Why it works: a room sleeping four to six people with phones, tablets, and the occasional laptop needs more outlet access than a standard bedroom’s two or three outlets provide, and a dedicated charging station — even just a small shelf with a multi-port charger built in — keeps cords off the floor and away from the bunk ladders.
How to do it: position the charging station at a height accessible from both the top and bottom bunk if possible, and use a surge-protected multi-port unit rather than a basic power strip, given how many devices are likely charging at once in a full bunk room.
Pro tip: run cord clips or a simple cable channel from the charging station up to the top bunk specifically — dangling charging cords near a top bunk ladder are a genuine tripping and tangling hazard that’s easy to prevent with a two-dollar cable clip.
19. Bunk Room Window Seat with Storage
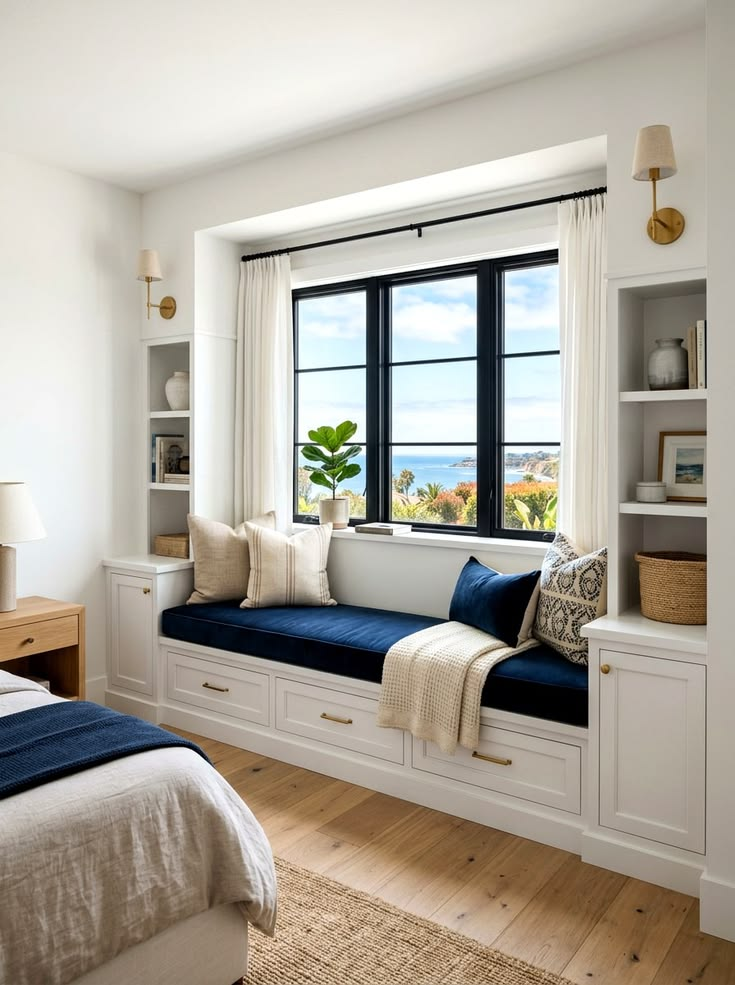
Why it works: if your bunk room has a window that isn’t ideal for a bed frame (too low, oddly placed), building a window seat with storage underneath turns that awkward wall into useful space — extra seating for the shared hangout area, plus storage for extra linens, life jackets, or off-season gear.
How to do it: size the storage compartment to your actual overflow needs (extra pillows, blankets, board games) rather than building it oversized, and use a lift-top or drawer-style access depending on how often you’ll need to get into it.
Pro tip: add a hinge-assist mechanism (a soft-close or gas-lift hinge) if you’re doing a lift-top bench — a heavy lid without one is a genuine pinched-finger risk, especially with kids opening and closing it to grab pool towels.
20. Family Crest or Custom Name Signage Per Bunk
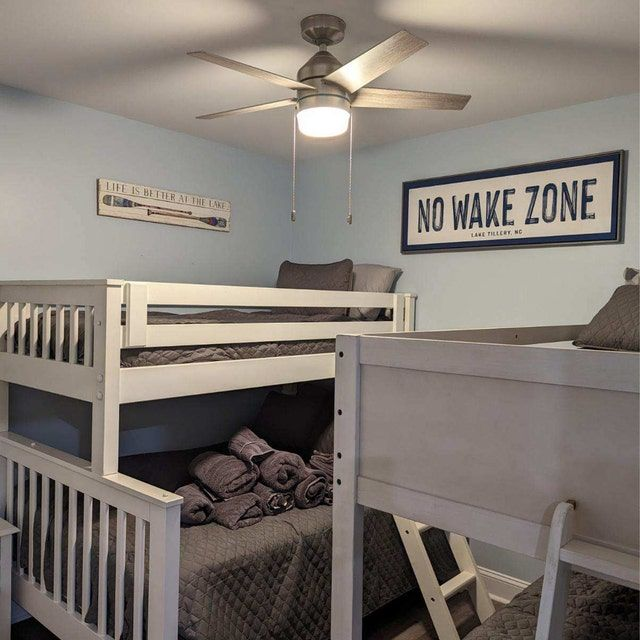
Why it works: this is a small, low-cost personalization detail, but a hand-lettered or printed name sign above each bunk (even just “Grandpa’s Bunk,” rotated or customized as needed) gives the room a sense of belonging and history that generic matching bedding doesn’t, especially in a lake house that’s been in the family for years.
How to do it: use a removable or easily updated sign format — a chalkboard-style tag, a slide-in nameplate — rather than anything permanently painted, since who sleeps where tends to shift year to year as kids grow up and family groups change.
Pro tip: this is the kind of detail that means more once a lake house has some years of history to it. I wouldn’t prioritize this on a brand-new build over the functional stuff on this list — ventilation, lighting, storage — but it’s a genuinely nice addition once the room’s already working well.
21. Bunk Room Built for Multi-Generational Groups
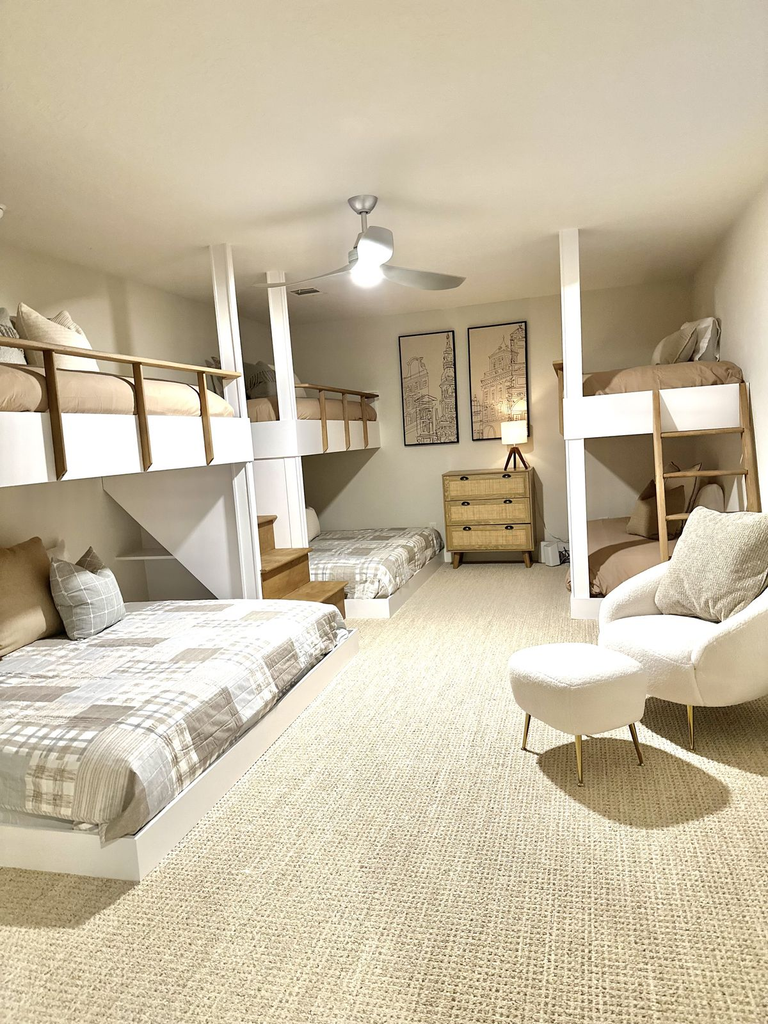
Why it works: if your bunk room regularly sleeps a wide age range — grandparents down to toddlers — the standard bunk bed assumption (kids on top, adults on bottom) needs more intentional planning than just defaulting to that split, since not every older adult wants to be relegated to a bottom bunk either, and not every kid wants to be up top.
How to do it: build in at least one bottom bunk with easier, wider access (a lower step height, sturdier handrail) specifically designed with mobility in mind, and don’t assume the whole room needs identical bunk heights.
Pro tip: an actual full-size or queen daybed as one “bunk” option, positioned at floor level alongside the stacked bunks, is a smart addition for multi-generational groups — it gives at least one sleeper a full-size bed at ground level without a ladder, without turning the whole room into a mismatched mess.
22. Bunk Room with Blackout Curtains Per Window
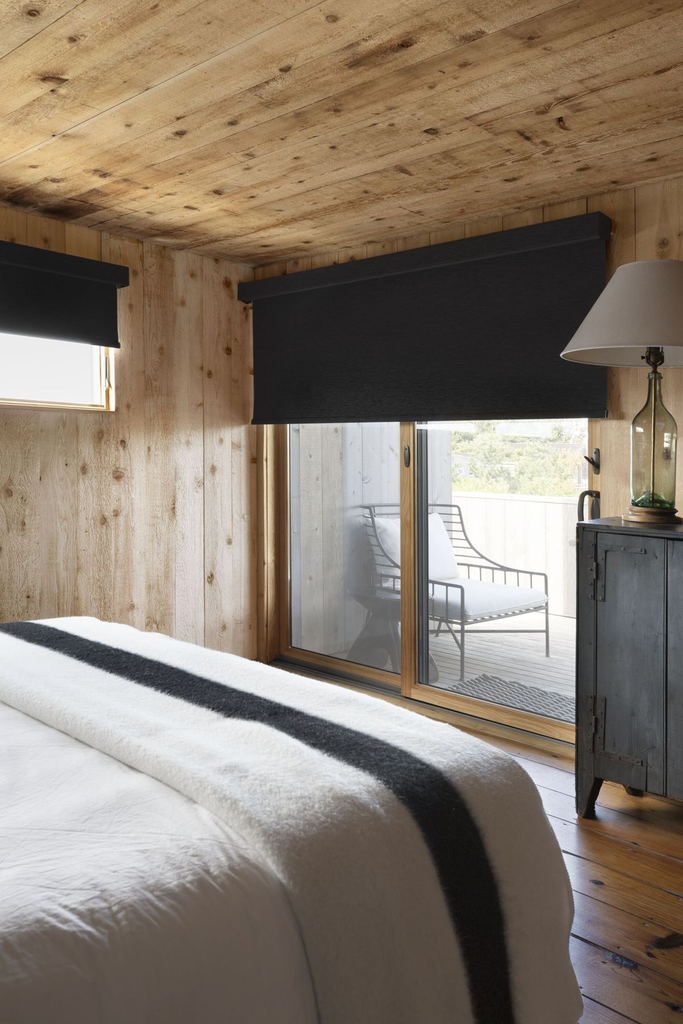
Why it works: lake house schedules run on natural light more than a lot of regular houses do — early sunrises over water, late dusk in summer — and a bunk room without blackout coverage means anyone trying to sleep in past 6am on a bright lake morning is out of luck.
How to do it: measure and fit blackout curtains or shades to the actual window, not a generic size, since gaps around the edges of an ill-fitting blackout curtain let in more light than people expect.
Pro tip: layer a lighter, more decorative curtain over the blackout layer if you want the room to still look bright and cheerful during the day — a purely blackout-curtained room can feel a little grim in daylight hours if that’s the only window treatment in the space.
23. Bunk Room with a Small Mini-Fridge or Snack Station
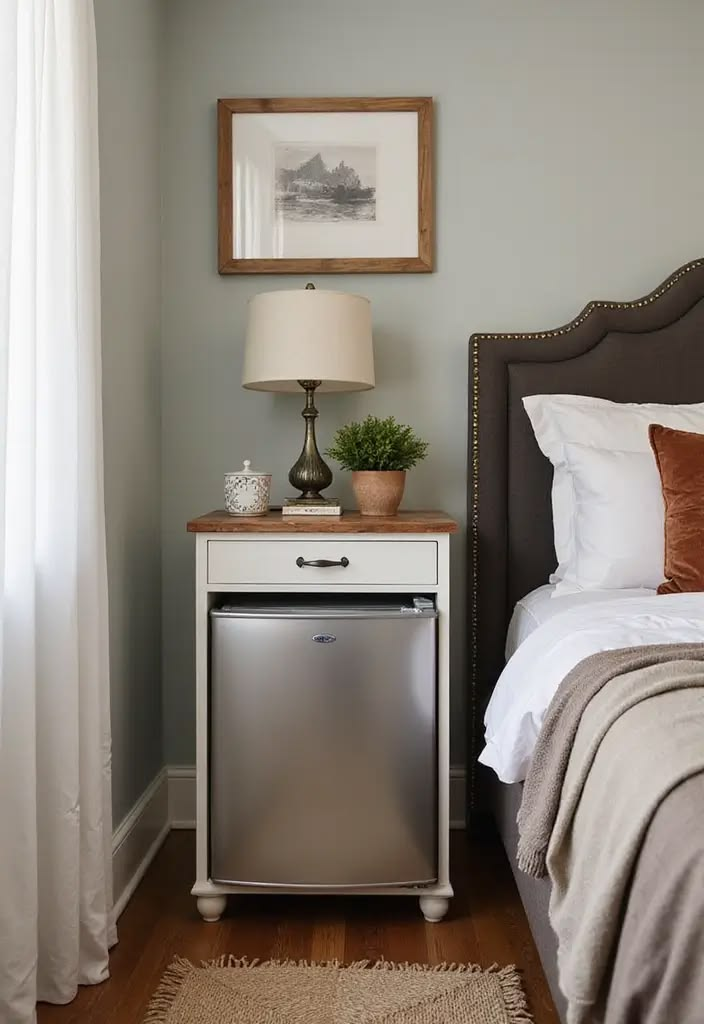
Why it works: this sounds like a small luxury, but a small mini-fridge or a simple snack shelf in a bunk room cuts down significantly on late-night and early-morning trips through the rest of a sleeping house, which matters when you’ve got a full lake house of guests on different schedules.
How to do it: a compact, quiet-running mini-fridge (look specifically for a “quiet” or low-decibel rating, since some budget models run louder than you’d expect for a shared sleeping room) tucked into an unused corner or under a window seat works well here.
Pro tip: stock it with water and simple snacks rather than anything that needs real refrigeration for food safety — the point is convenience, not turning the bunk room into a second kitchen.
24. Exposed Beam or Vaulted Ceiling Bunk Room
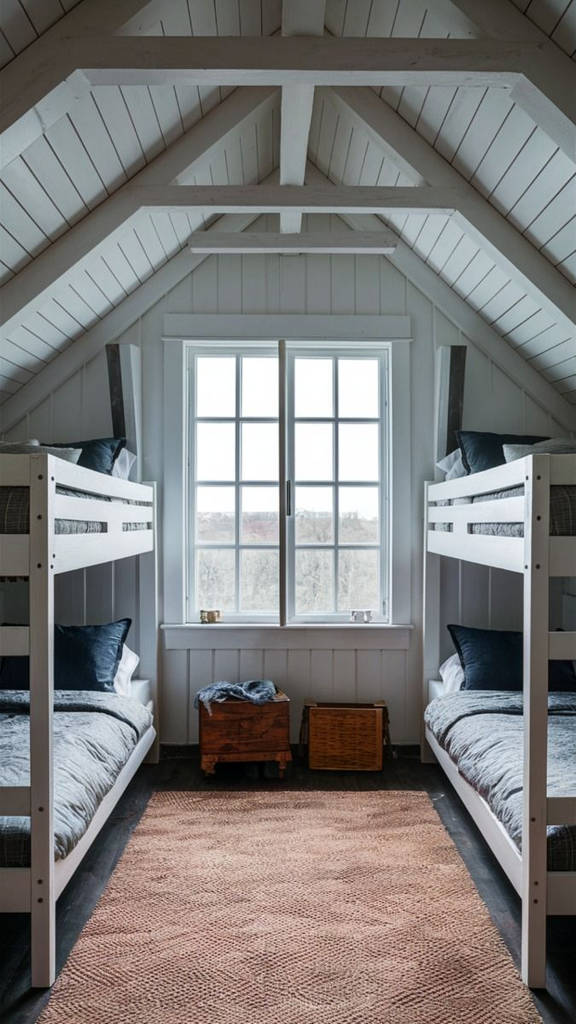
Why it works: a lot of lake houses, especially older ones or A-frame style builds, have genuinely great ceiling architecture — exposed beams, vaulted lines — that a standard bunk room setup can end up hiding or ignoring, when it could actually be the room’s best feature.
How to do it: keep the bunk frames themselves simple and let the ceiling do the visual work, rather than adding a lot of competing decor or a busy theme on top of an already interesting architectural ceiling.
Pro tip: use uplighting (wall sconces that throw light upward) rather than only overhead fixtures in a room like this — it highlights the beam or vault lines in a way that flat overhead lighting doesn’t, and it makes the room’s best architectural feature actually visible at night, not just during the day.
25. Convertible Bunk Room (Trundle or Fold-Down Option)
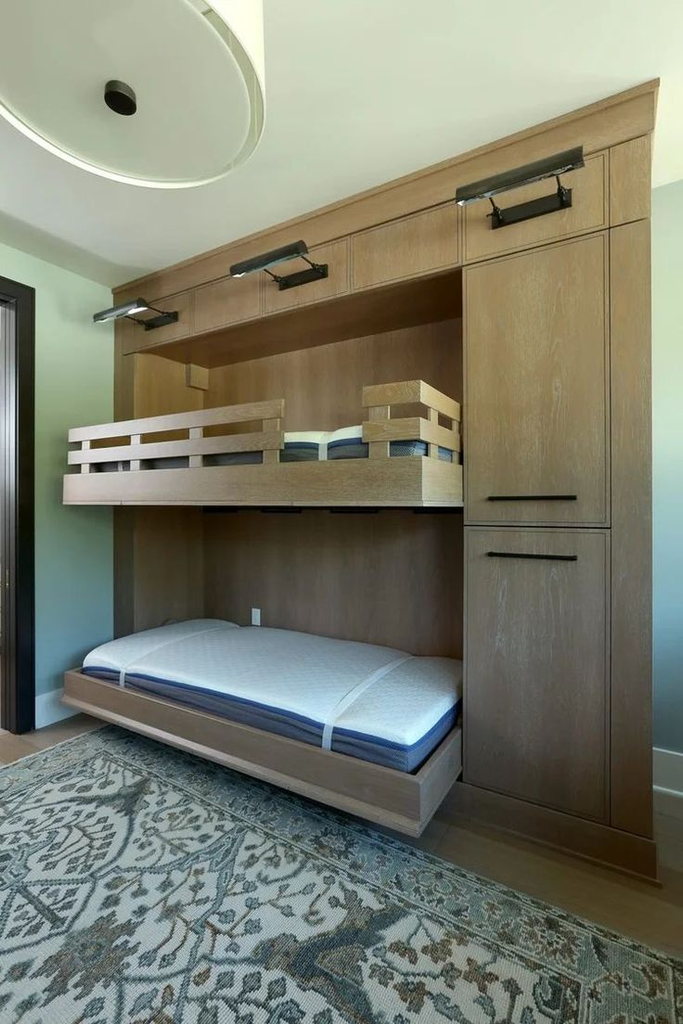
Why it works: if you don’t want to commit a whole room to bunks year-round — maybe it’s an office or a craft room most of the year and only becomes a bunk room during peak summer visits — trundle bunks or fold-down wall beds (Murphy-bed style, but bunk-configured) give you the flexibility to reclaim the floor space when the extra sleeping capacity isn’t needed.
How to do it: fold-down bunk systems need to be mounted into real structural framing, not just drywall, given the repeated weight-bearing use, so this is a project for a contractor rather than a weekend DIY unless you’ve got real carpentry experience.
Pro tip: budget more time than you’d expect for this option specifically — convertible and fold-down bunk systems typically have a longer lead time to order and install than a standard fixed bunk build, so this isn’t the project to start in May if you need it ready for a July trip.
What This Actually Costs
- Under $500: Freestanding stackable bunks (budget to mid-range), individual reading lights, a room-size rug, and blackout curtains — the highest-impact, lowest-cost upgrades on this list.
- $500-2,000: A basic built-in bunk frame with under-bed storage, a ceiling fan installation, or a window seat with storage — mostly materials and labor for a contained carpentry project.
- $2,000-6,000: A full wall-to-wall or L-shaped built-in bunk system with built-in stairs, a charging station, and matched storage — this range usually covers a full bunk room renovation done by a contractor.
- $6,000+: Structural additions like a skylight, an attached half-bath, or a fold-down convertible bunk system — anything requiring real construction beyond the bunk beds themselves.
Where I’d Start
If I were building this out from scratch, I’d start with the stuff nobody photographs — ventilation, individual lighting, and a genuinely safe ladder or stair pitch — before touching anything about the theme or color palette. A gorgeous bunk room that’s stuffy, dark after 9pm, and has a wobbly ladder is going to get complaints by day three of a lake house trip no matter how good it looks in the listing photos. Get the room to actually function for a full week of real use first, and let the design details be the fun part you add once the bones are solid.


Leave a Reply