
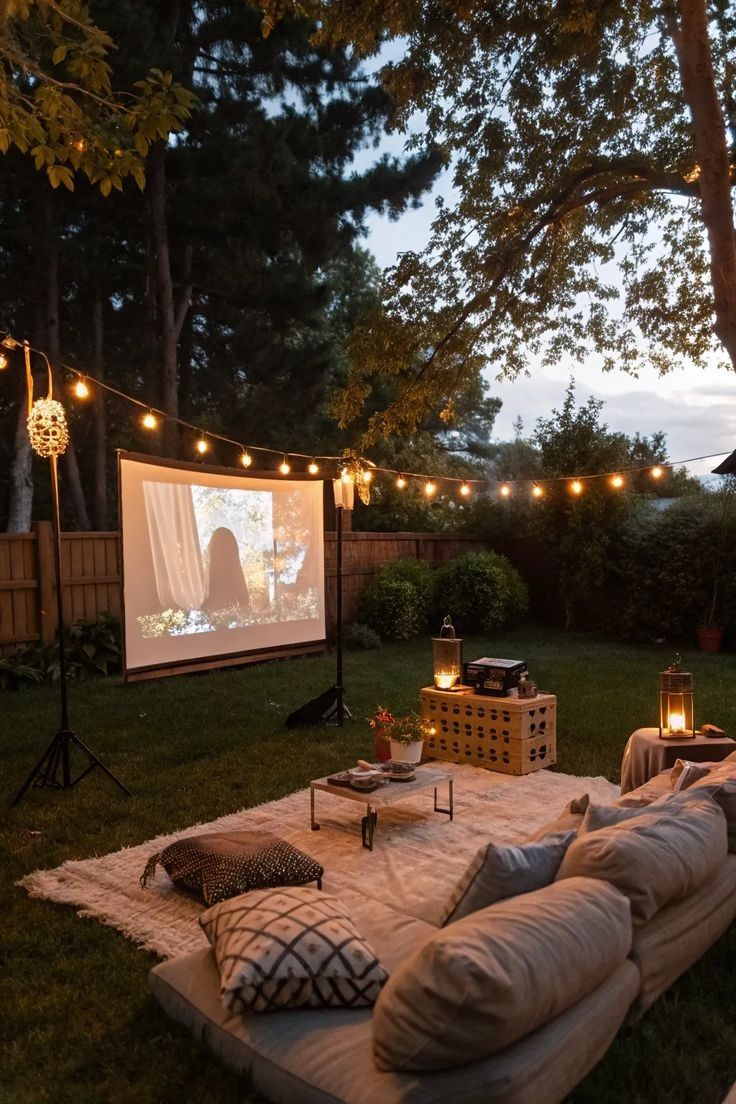
I used to treat my backyard like a room I’d forgotten I owned. It had a rusted patio set, one sad string of solar lights that half-worked, and a corner where the previous owners left a stack of pavers I ignored for two full summers.
Then last spring I got tired of scrolling other people’s yards on Pinterest and actually started building things — badly, at first, and then less badly.
If you’re in the same spot — a yard, patio, or even just a concrete slab that’s technically “outdoor space” but doesn’t function like one yet — this list is for you.
These are DIY outdoor projects I’ve either built myself, watched a friend build, or picked up from readers who emailed me their own version after a post went semi-viral on my Pinterest board. I’m not going to pretend all 23 are equally easy.
Some are weekend projects with a drill and enough patience. A couple are multi-weekend builds that need a saw and a plan.
I’ll tell you which is which as we go, plus what each one actually costs, because “cheap DIY” means something different depending on whether you’re buying cedar or pressure-treated pine.
By the end of this, you should have a real shortlist — not 23 things to feel vaguely inspired by, but 4 or 5 you could realistically start this weekend.
Quick Guide: Which Projects Fit Your Situation
Before the full list, here’s how these 23 break down by effort and budget, because “DIY outdoor project” covers everything from a $15 afternoon to a $400 weekend build.
| Project Type | Time Needed | Typical Cost | Best For |
|---|---|---|---|
| No-tool / low-tool projects | 1-3 hours | $10–$60 | Renters, apartment patios, first-timers |
| Weekend builds (basic tools) | 4-8 hours | $50–$200 | Small backyards, first “real” DIY project |
| Multi-weekend builds | 2-4 weekends | $150–$500+ | Homeowners with a saw and some patience |
| Garden/planting projects | Varies, ongoing | $20–$150 | Anyone who wants year-over-year payoff |
Okay. Let’s get into it.
1. Build a Pallet Planter Box (Instead of Buying One)
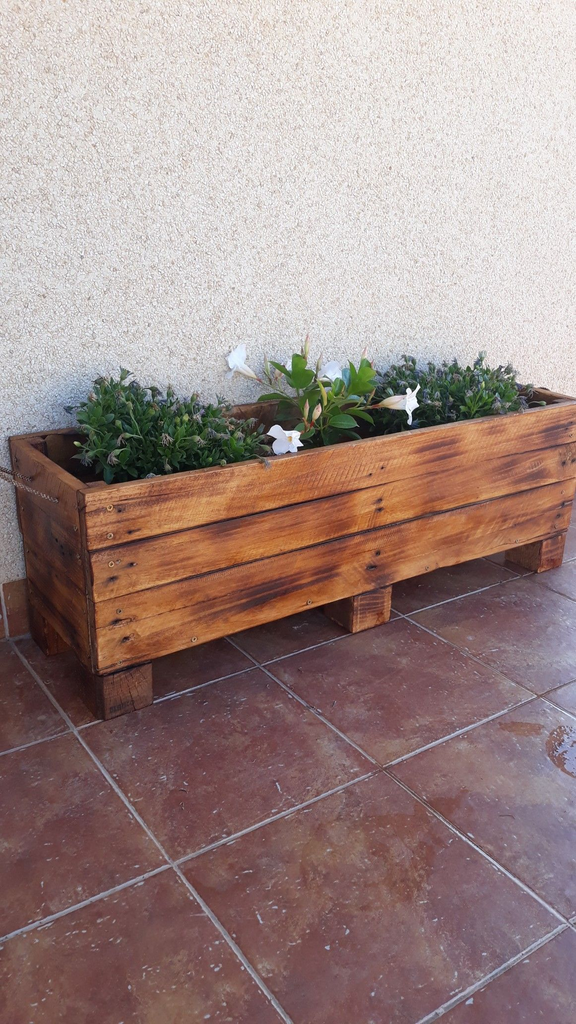
Why it matters: Raised planter boxes at the garden center start around $80 for something flimsy. A pallet — often free if you ask nicely at a hardware store or landscaping supplier — gets you the same footprint for the cost of a few screws and a can of stain.
How to do it: Pull the boards off a standard pallet with a pry bar (wear gloves, pallet wood splinters are no joke), then rebuild them into a simple box frame, lining the inside with landscape fabric so soil doesn’t spill through the gaps.
Pro tip: Not all pallets are safe for growing food in — look for the “HT” (heat-treated) stamp, not “MB” (methyl bromide, a chemical fumigant). My friend Priya skipped checking this on her first build and ended up tearing the whole thing apart once she looked it up. Don’t be Priya.
2. Make a Concrete Paver Path
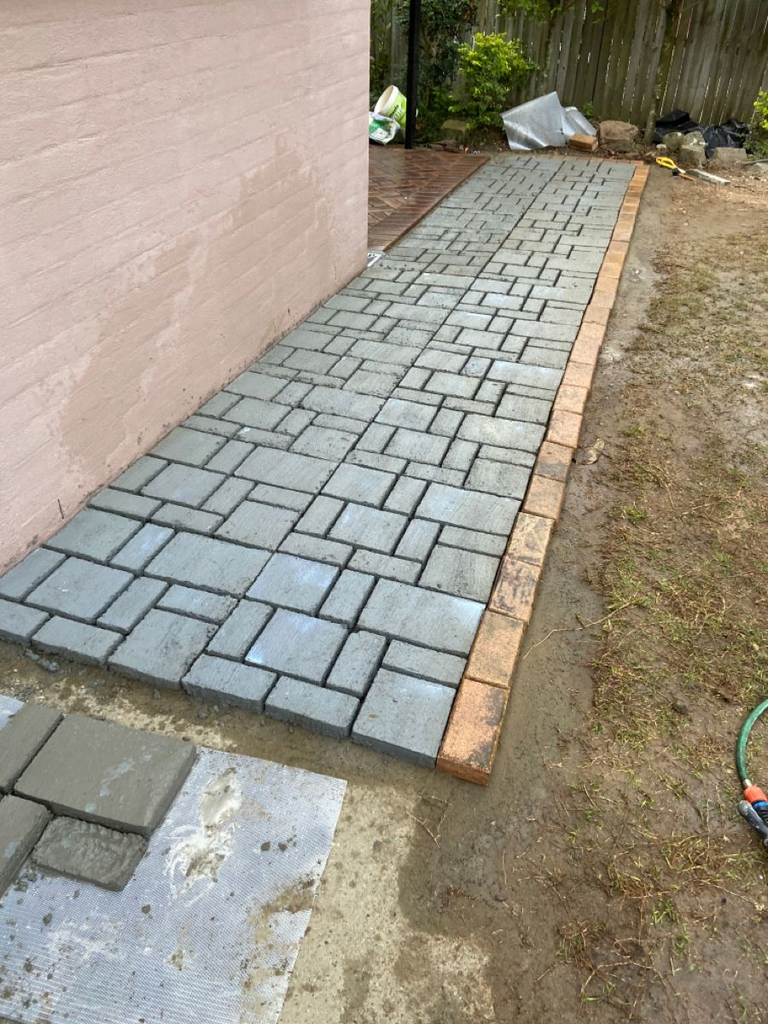
Why it matters: A defined path does more for how “finished” a yard looks than almost anything else on this list, and it stops the muddy foot-trail that forms naturally where people actually walk.
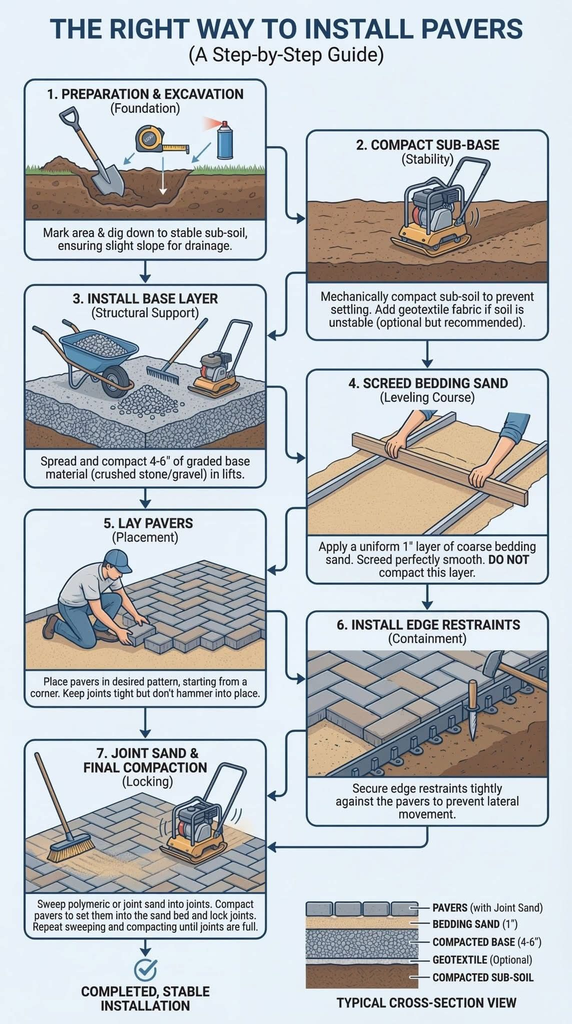
How to do it: Mark your path with spray paint, dig out about 2 inches of soil, add a sand base, then set pavers directly into it, tapping each one level with a rubber mallet.
The trade-off: This one’s deceptively labor-intensive — not hard, just a lot of kneeling and tamping. Budget a full Saturday for anything longer than 10 feet.
3. Build a Simple Cedar Planter Bench
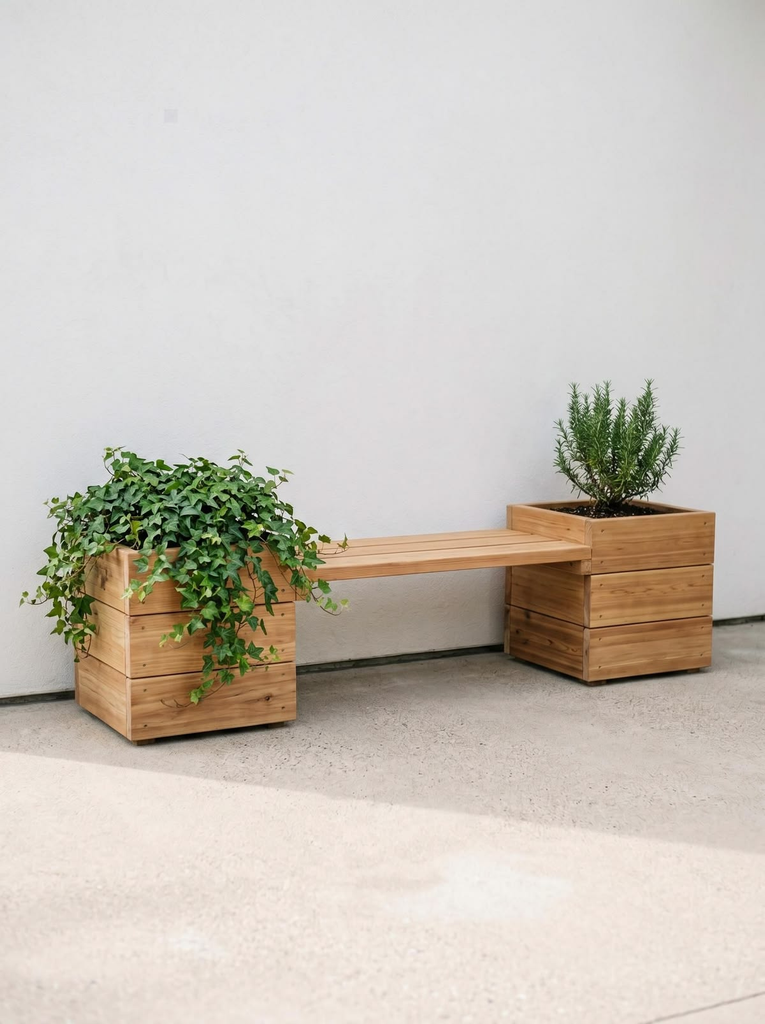
Why it matters: You get seating and a planter in one footprint, which matters if your patio is small enough that every square foot has to do double duty.
How to do it: This is a basic box-and-legs build — four cedar 2×4 legs, a plywood or cedar-plank seat, and a lined planter box built into one end. Cedar costs more than pine but doesn’t need yearly sealing.
Pro tip: Seal the inside of the planter section separately from the seat with pond liner or thick plastic sheeting, or the wood around the soil will rot within a season regardless of what wood you used.
4. Hang String Lights the Right Way (Not the Way That Sags)
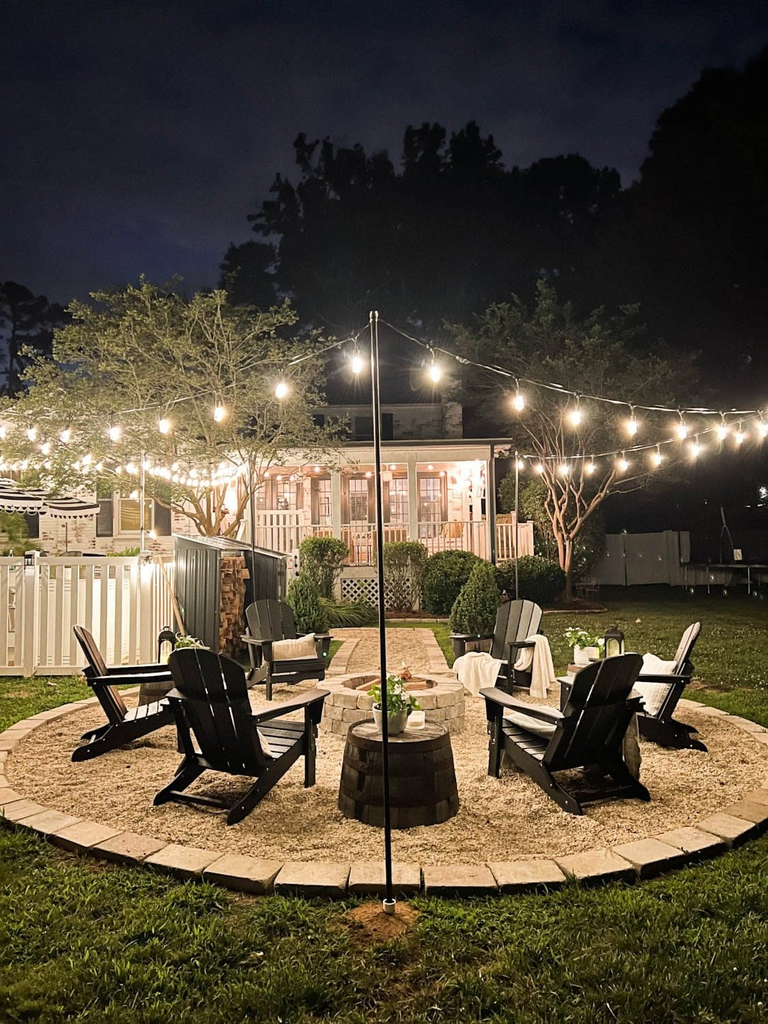
Why it matters: Everyone strings lights. Almost nobody tensions them properly, which is why so many backyard string-light setups sag into a droopy catenary curve within a month.
How to do it: Run a length of steel guide wire between your anchor points first, then zip-tie your lights to the guide wire instead of hanging the light strand’s own cord under tension.
Pro tip: This is the fix almost no post mentions — the lights themselves aren’t rated to bear their own weight over long spans. The guide wire is doing the structural work; the lights are just along for the ride.
5. Build a Vertical Pallet Herb Garden
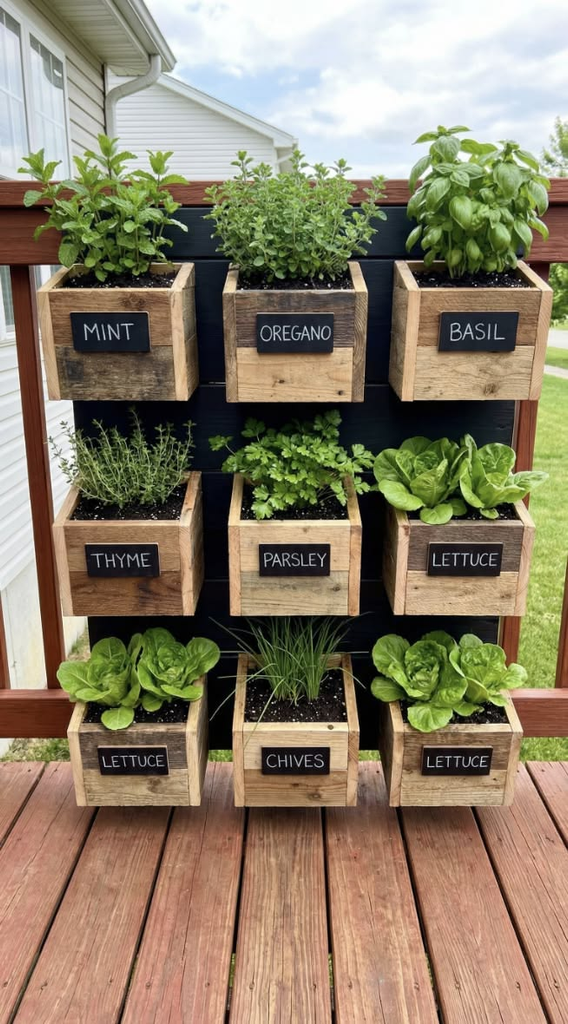
Why it matters: If you’re working with a small patio or balcony, vertical growing space is free real estate you’re not using.
How to do it: Staple landscape fabric to the back and bottom of a pallet’s slats to create pockets, fill with potting soil, then plant herbs into the gaps between slats, working bottom row first.
Trade-off worth knowing: Water drains fast in this setup, so the top row dries out noticeably faster than the bottom. I water mine top-down and let gravity redistribute a bit.
6. DIY a Fire Pit From a Steel Ring Kit
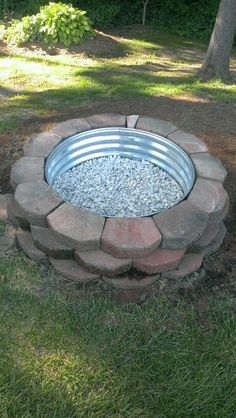
Why it matters: A store-bought fire pit runs $150–$400. A steel fire ring insert (the actual expensive, code-relevant part) plus a DIY stone surround gets you the same result for less, and it’s genuinely a weekend, not a multi-weekend project.
How to do it: Dig a shallow circular trench, set the steel ring in the center, then stack retaining wall block or fire-rated stone around it in a dry-stack pattern (no mortar needed for most designs).
Pro tip: Check your local fire code before you build — some municipalities require a minimum distance from structures or cap pit diameter, and this is the one project on the list where skipping that step can actually get you fined.
7. Build a Simple A-Frame Trellis
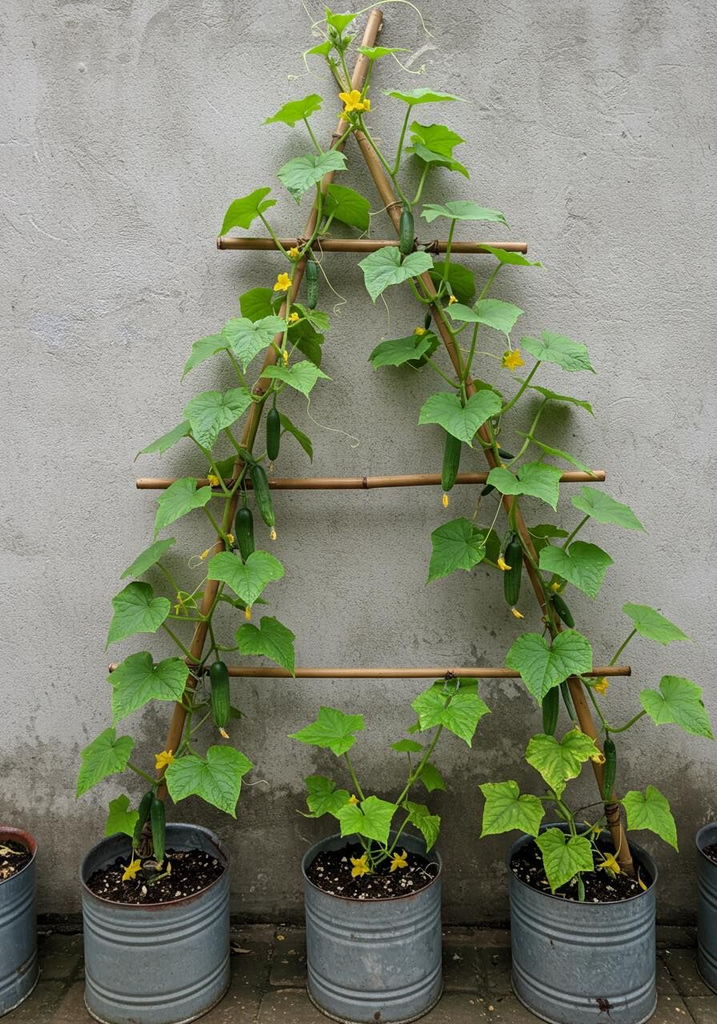
Why it matters: Climbing plants like cucumbers, peas, and some squash varieties take up a fraction of the ground space when they grow vertically, which matters a lot in a small vegetable bed.
How to do it: Two wood frames hinged at the top, with garden netting or twine strung across each side in a grid.
Pro tip: Build it taller than you think you need. My first trellis was 4 feet and my cucumber vines outgrew it by mid-July and started flopping over the top.
8. Paint or Stain Your Fence (and Actually Prep It First)
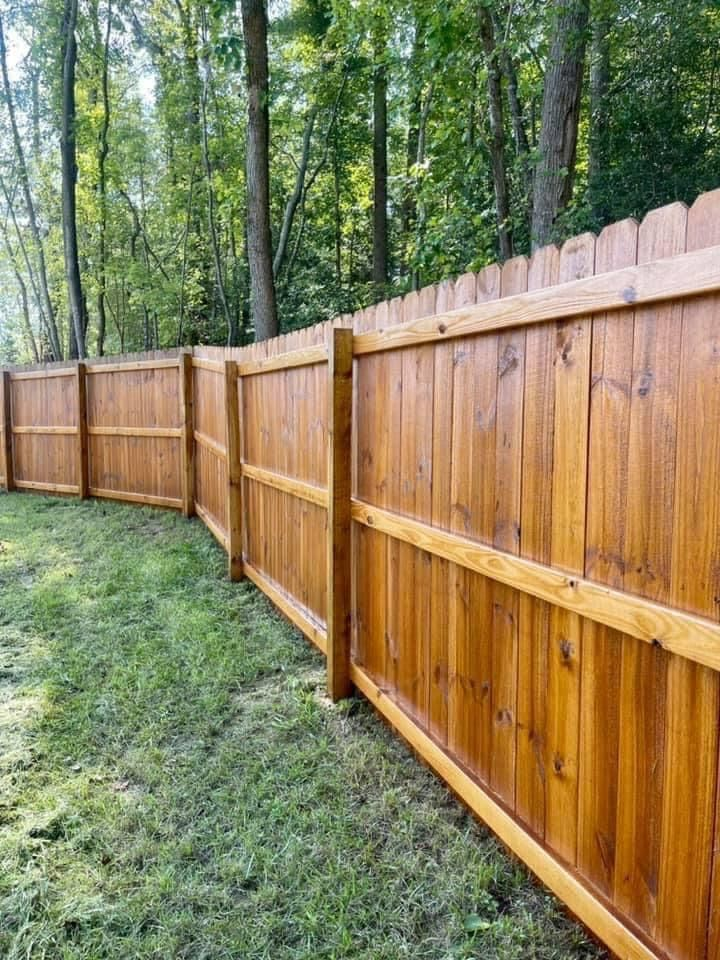
Why it matters: A tired, gray, weathered fence drags down the whole yard’s appearance more than almost anything else, and it’s usually the cheapest fix on this entire list relative to its visual impact.
How to do it: Power-wash first and let it dry fully (minimum 24-48 hours), then apply a solid stain rather than paint — stain penetrates the wood instead of sitting on top, so it won’t peel the way paint eventually does on outdoor wood.
Cost angle: A 5-gallon bucket of solid exterior stain runs roughly $120–$180 and covers most standard suburban fence lines — cheaper than most single furniture pieces on this list.
9. Build a Freestanding Pergola Frame
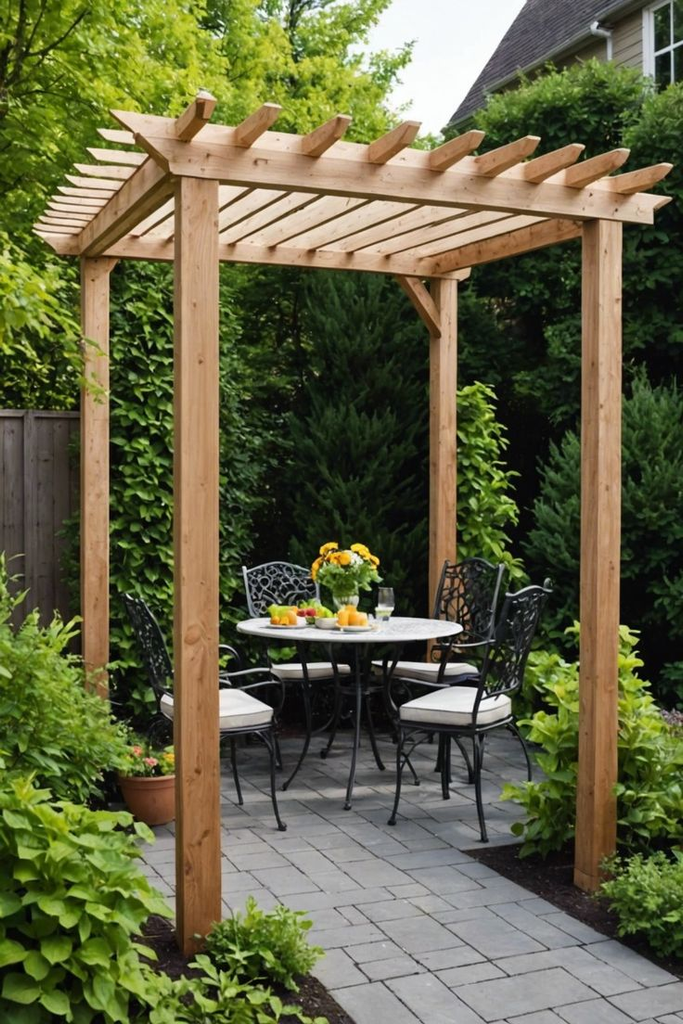
Why it matters: Shade structures change how usable a patio is in peak summer heat, and a pergola gives you that without blocking airflow the way a solid roof would.
How to do it: This is genuinely the most involved build on the list — four posts set in concrete footings, connected by beams and rafters. Budget 2-3 weekends minimum, and this is one project where I’d actually recommend renting a post-hole digger instead of hand-digging.
Trade-off worth knowing: Skip this one if you’re not comfortable working with a post-hole digger and concrete mix — it’s the project most likely to go sideways for a true first-timer. Consider a kit if it’s your first structural build.
10. Make Concrete Stepping Stones With Leaf Impressions
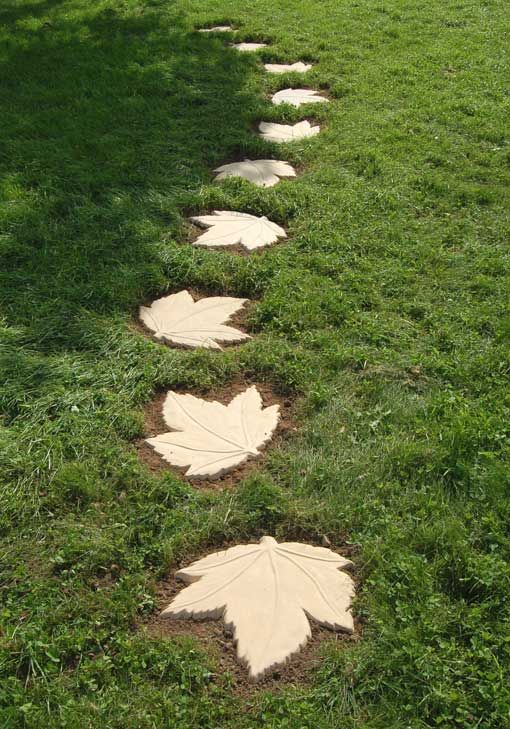
Why it matters: These cost almost nothing to make and give you a genuinely custom garden path detail you can’t buy at a store.
How to do it: Mix quick-set concrete, pour into a round mold (an old plant saucer works fine), press a large leaf face-down into the wet concrete, then peel it off once cured.
Pro tip: Rhubarb and hosta leaves give the cleanest vein detail. Thin, papery leaves tend to tear before you can peel them.
11. Build a Raised Garden Bed From Cedar Fence Pickets
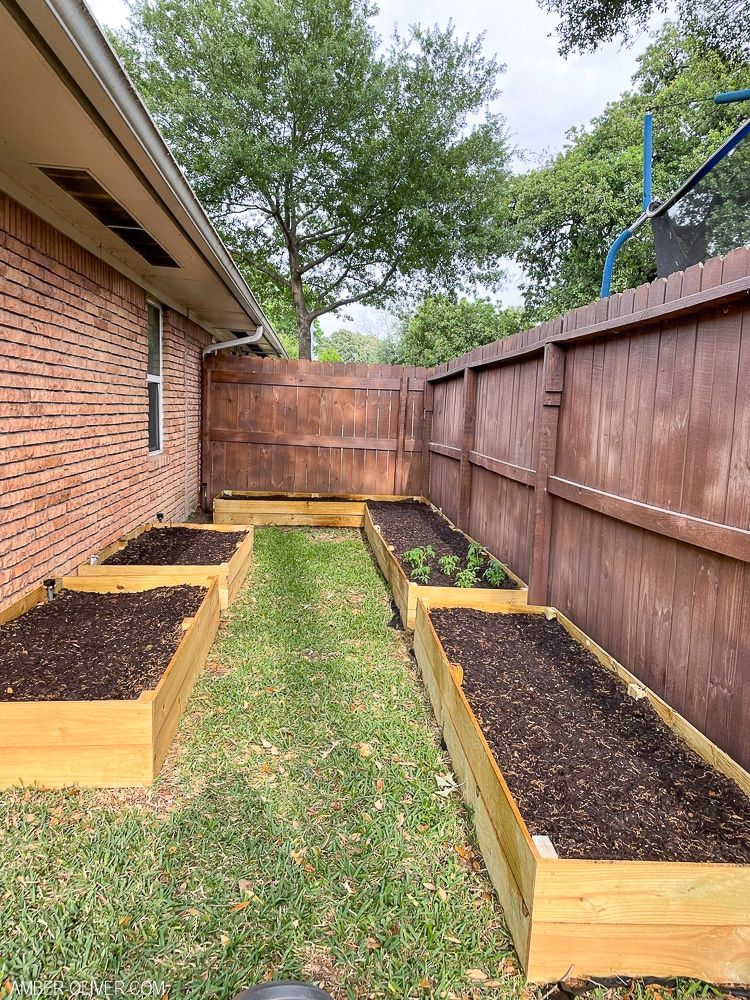
Why it matters: Full cedar boards for raised beds get expensive fast. Fence pickets are the same wood, cut down and sold cheaper because they’re marketed for a different use.
How to do it: Screw pickets into a corner-post frame to build the walls of a rectangular bed, then line the bottom with hardware cloth if you’re worried about burrowing animals.
Cost angle: A 4×8 raised bed built from pickets runs roughly $60-90 in materials, compared to $150+ for the equivalent pre-made cedar kit.
12. Build a DIY Outdoor Bar Cart From an Old Dresser
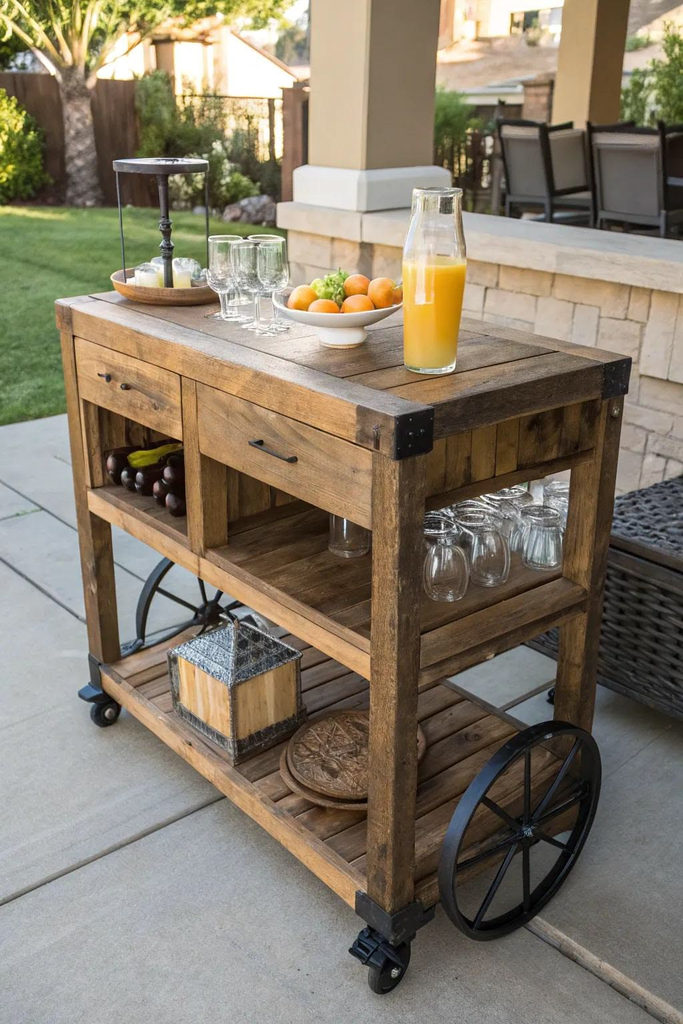
Why it matters: If you’ve got a dresser that’s too beat-up for indoor use but structurally sound, this gives it a second life instead of a trip to the curb.
How to do it: Sand and seal every surface with an exterior-rated polyurethane (this is the step people skip and then wonder why the drawers swell after one rainstorm), then add locking caster wheels so it can be rolled inside during bad weather.
Pro tip: Even “weatherproofed” furniture like this should live under some kind of cover — a pergola, umbrella, or patio roof — not fully exposed. Sealed wood still swells and warps with repeated soaking.
13. Build a Simple Compost Bin From Wood Pallets
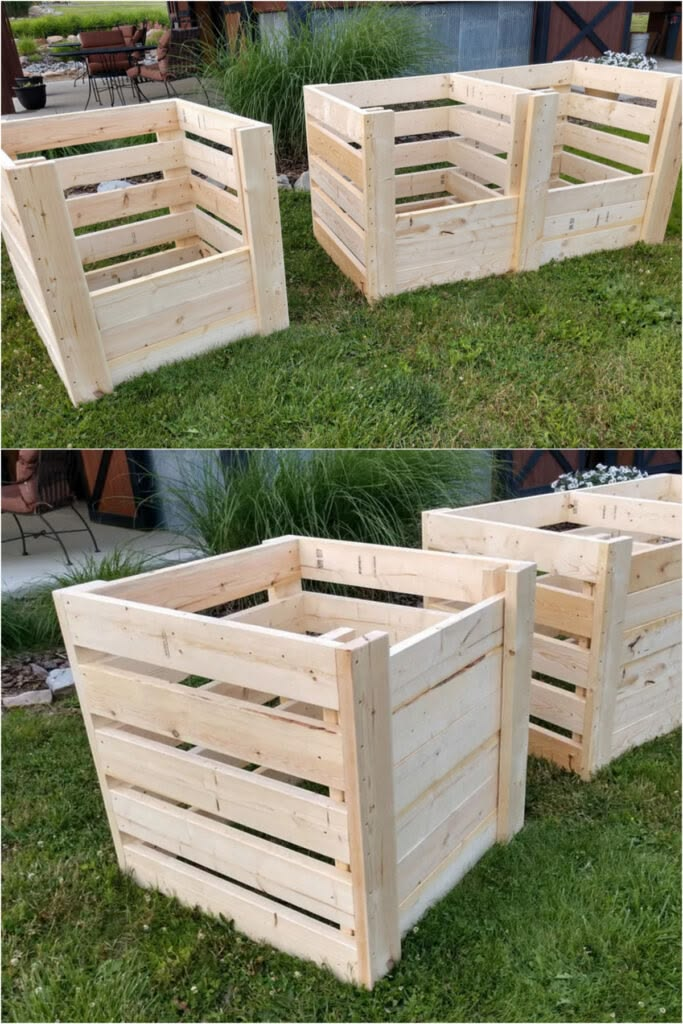
Why it matters: Store-bought compost tumblers run $80-150. Three pallets wired together into a three-sided bin does the same job for close to free.
How to do it: Stand three pallets on their edges in a U-shape, zip-tie or wire the corners together, and leave the front open for turning material with a pitchfork.
Trade-off worth knowing: This open design composts slower than a sealed tumbler because it doesn’t retain heat as well — expect a few extra weeks before it’s usable.
14. Build a Ladder Plant Stand
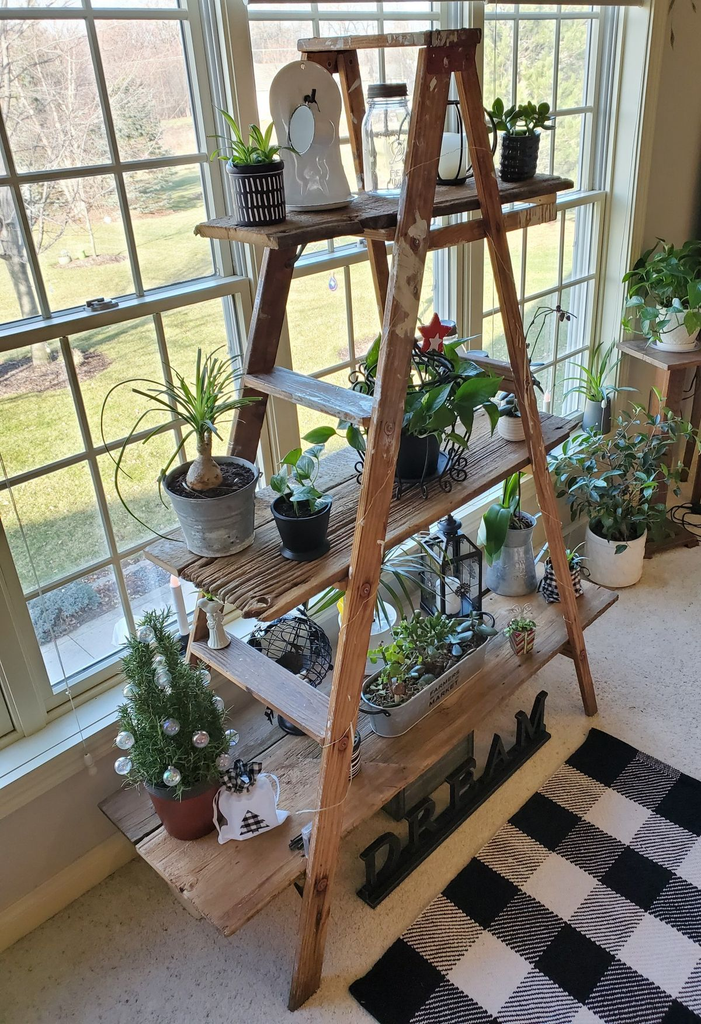
Why it matters: An old wooden ladder — thrift store, garage sale, or the one collecting dust in your garage — turns into tiered plant display space without buying a single new material.
How to do it: Lean it at an angle against a wall or fence, then rest planters on each rung, largest pots on the bottom rung for stability.
Pro tip: Check the ladder’s structural integrity before loading it with heavy ceramic planters — a wobbly rung with a full pot on it is how you end up with a broken planter and a broken plant.
15. Build an Outdoor Shower Enclosure
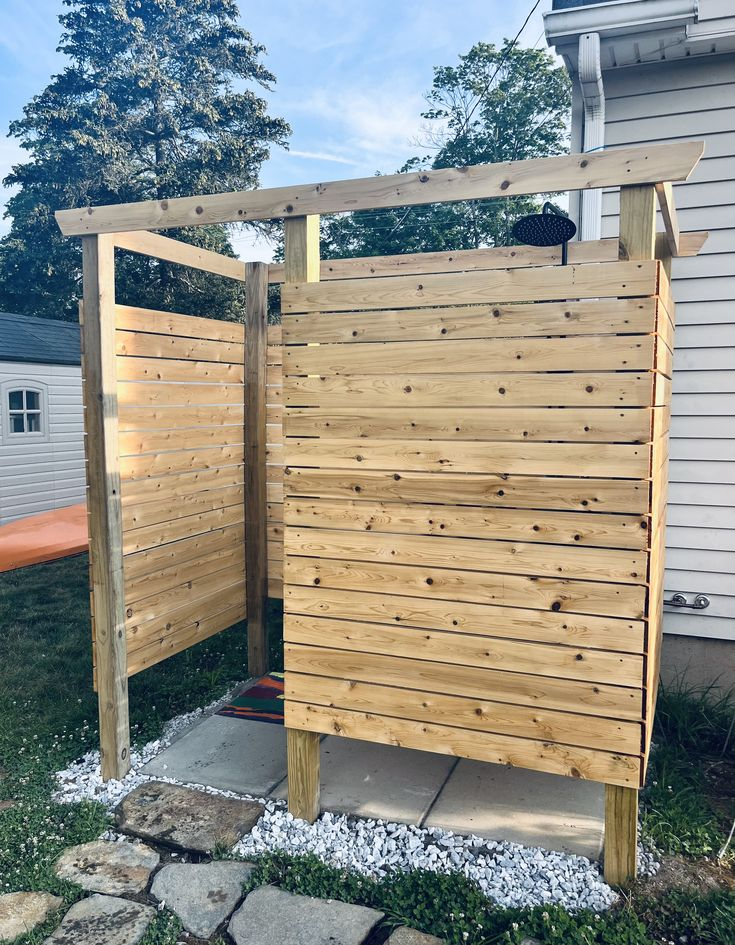
Why it matters: If you’ve got a pool, live near a beach, or just want to rinse off sand and dirt without tracking it through the house, this is one of those projects that feels like a luxury but is actually a straightforward frame build.
How to do it: Build a three-sided privacy frame from pressure-treated 2x4s, attach it near an existing outdoor spigot or hose bib, and run a shower head extension up one post.
Trade-off worth knowing: Check local code on gray water drainage before you build — some areas have restrictions on where outdoor shower runoff can go.
16. Make DIY Concrete Planters From Dollar-Store Containers
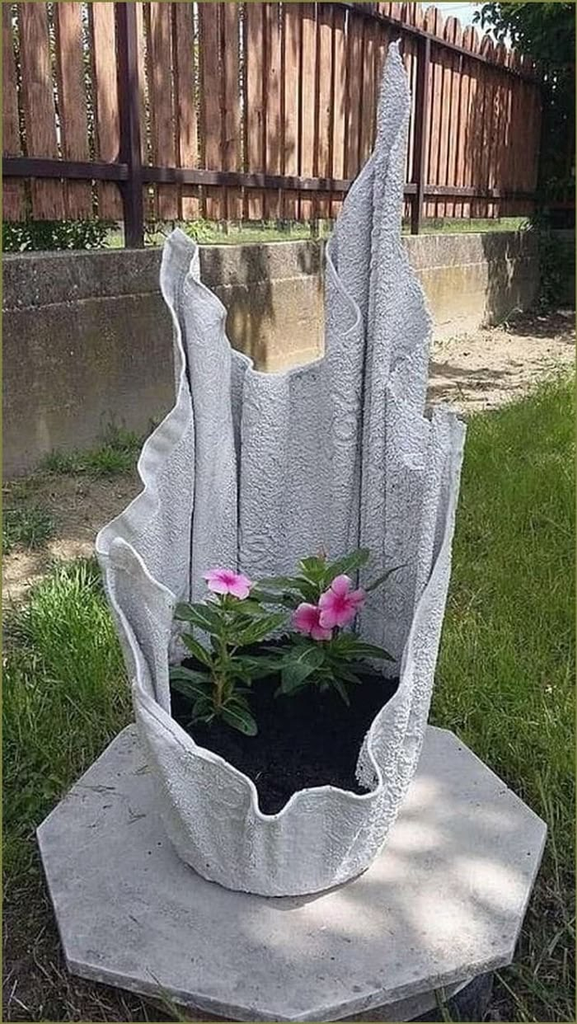
Why it matters: Modern concrete planters at home decor stores run $30-60 each for something small. You can make several from one bag of concrete mix.
How to do it: Nest two plastic containers (one slightly smaller than the other) with a gap between them, pour concrete into the gap, let it cure 24-48 hours, then pop both molds off.
Pro tip: Grease the inside of both molds with cooking spray before pouring, or you’ll be fighting the concrete out of the mold for twenty minutes like I did the first time.
17. Build a Privacy Screen From Lattice Panels
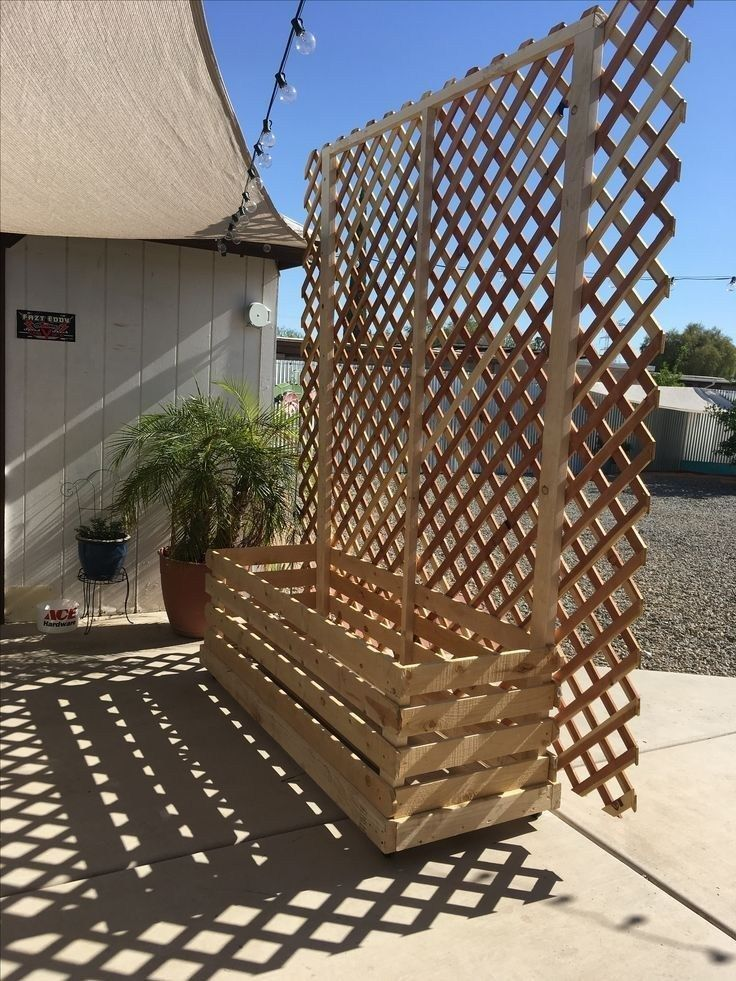
Why it matters: If a neighbor’s yard, a busy street, or an AC unit is ruining an otherwise decent patio view, a privacy screen fixes it without the cost of a full fence extension.
How to do it: Frame out a simple rectangle from 2x4s, attach a pre-made lattice panel to the frame, and set it in post anchors or concrete footings depending on how permanent you want it.
Cost angle: A single lattice panel with basic framing runs $40-80, compared to several hundred for extending an actual fence line.
18. Build a DIY Birdbath From a Terracotta Pot and Saucer
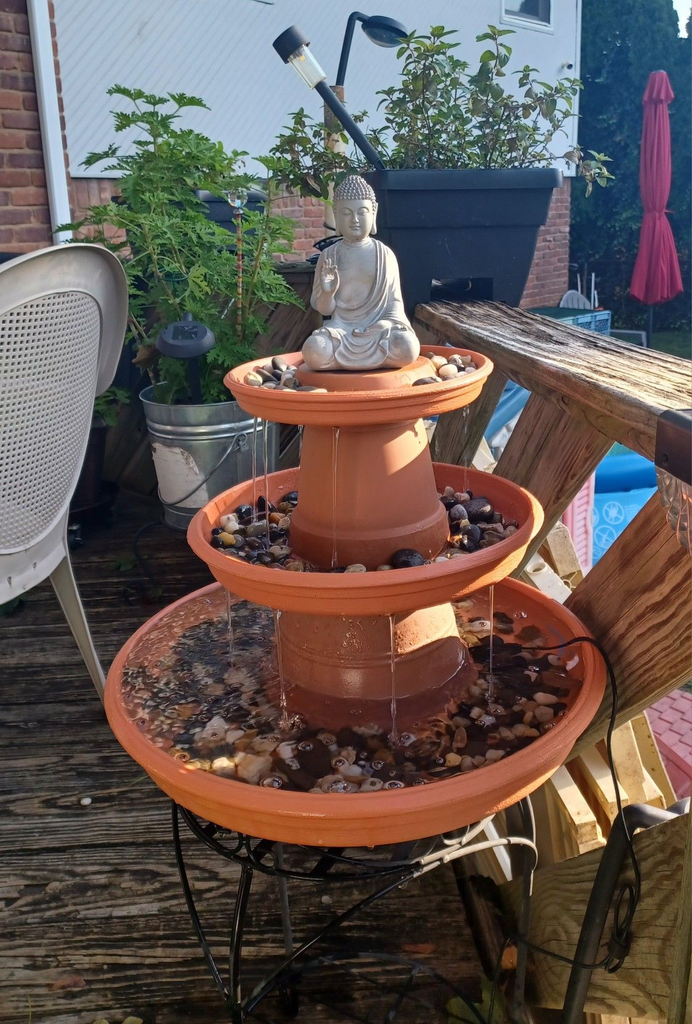
Why it matters: This is one of the cheapest, fastest projects on the entire list, and it genuinely brings more birds into a yard than most people expect.
How to do it: Stack an upside-down terracotta pot as the base, glue a saucer on top with outdoor-rated construction adhesive, and let it cure fully before filling with water.
Pro tip: Add a few flat stones in the saucer’s water — bees and smaller birds need a landing spot that isn’t fully submerged, or they can’t safely drink.
19. Build a Simple Wood Deck Box for Storage
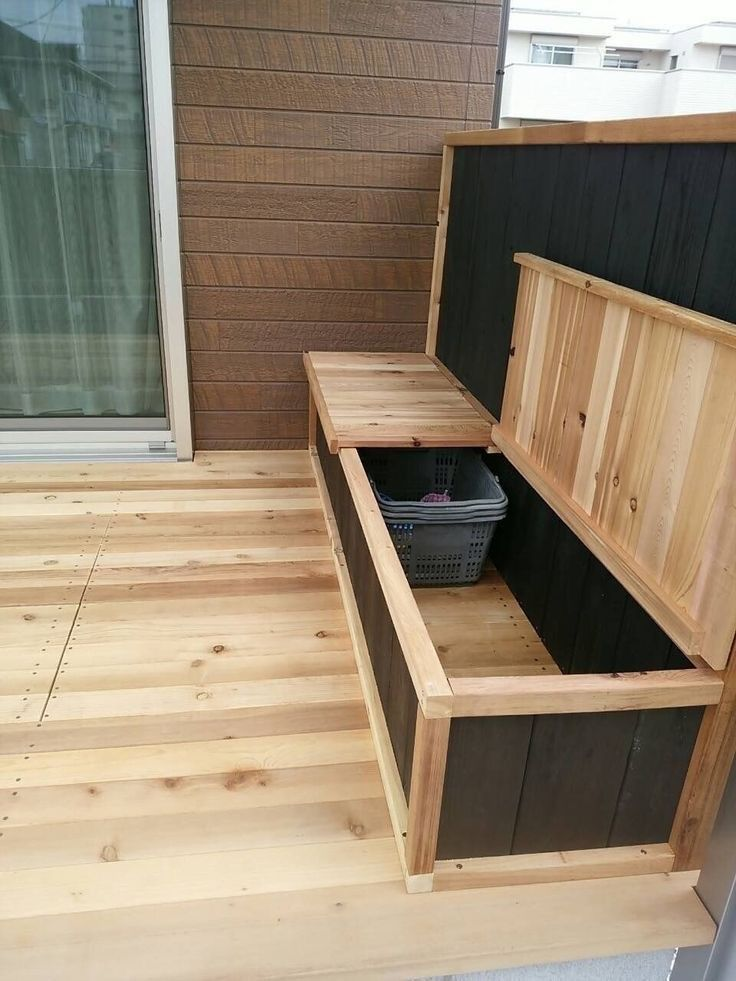
Why it matters: Cushions, pool toys, and gardening tools need somewhere that isn’t “scattered across the patio,” and a built deck box is sturdier than most plastic storage bins from a big-box store.
How to do it: Build a basic plywood box with a hinged lid, then trim the exterior with cedar boards so it doesn’t look like a plywood box.
Trade-off worth knowing: Drill a few small drainage holes in the bottom corners — without them, rainwater that gets in through the lid seams has nowhere to go and will sit and rot the contents.
20. Build a Hanging Egg Chair Frame
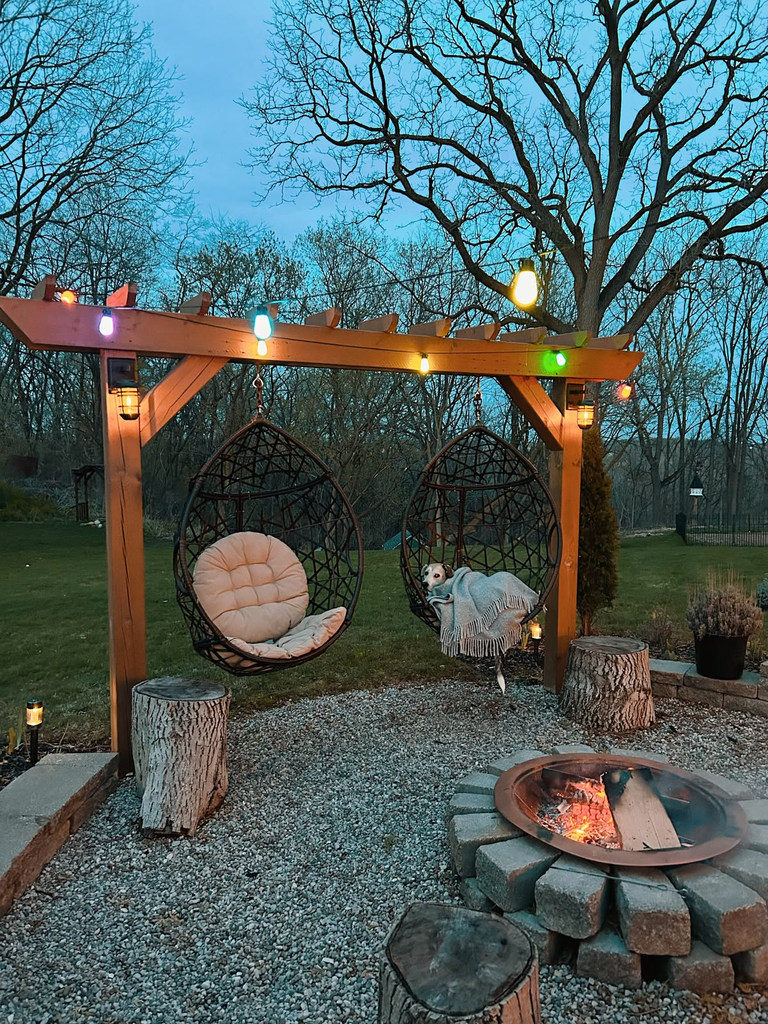
Why it matters: The actual hanging chair is easy to buy. The A-frame stand to hold it is the expensive part — often $200+ retail — and it’s a straightforward enough build that it doesn’t need to be.
How to do it: Build two matching A-frame supports from 4×4 lumber, connect them with a crossbeam rated for the chair’s hanging weight, and use a heavy-duty swivel hook rated well above the combined weight of chair and person.
Pro tip: Don’t guess on the weight rating of the swivel hook — check the manufacturer spec and go higher than you think you need. This is the one project on this list where cutting corners on hardware is a genuine safety issue, not just a durability one.
21. Build a DIY Drip Irrigation System From Basic Tubing
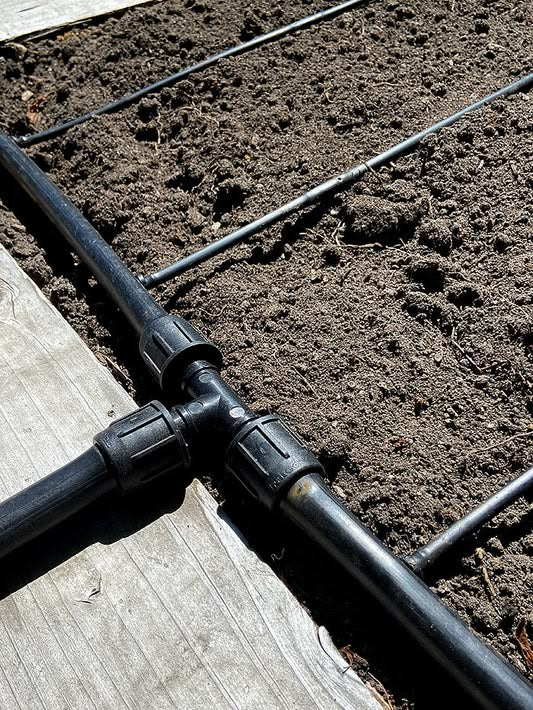
Why it matters: If you’ve ever come back from a week away to a dead garden, this solves it — and a basic version is far cheaper than a smart sprinkler system.
How to do it: Run 1/2-inch poly tubing along your garden bed, punch small holes or insert drip emitters at each plant, and connect the whole thing to an inexpensive hose-end timer.
Cost angle: A basic setup for a single garden bed runs $30-50 in tubing and emitters, versus $150+ for a zoned smart-sprinkler system that’s honestly overkill for most home gardens.
22. Build a Reclaimed Wood Address Sign or Planter Marker Set
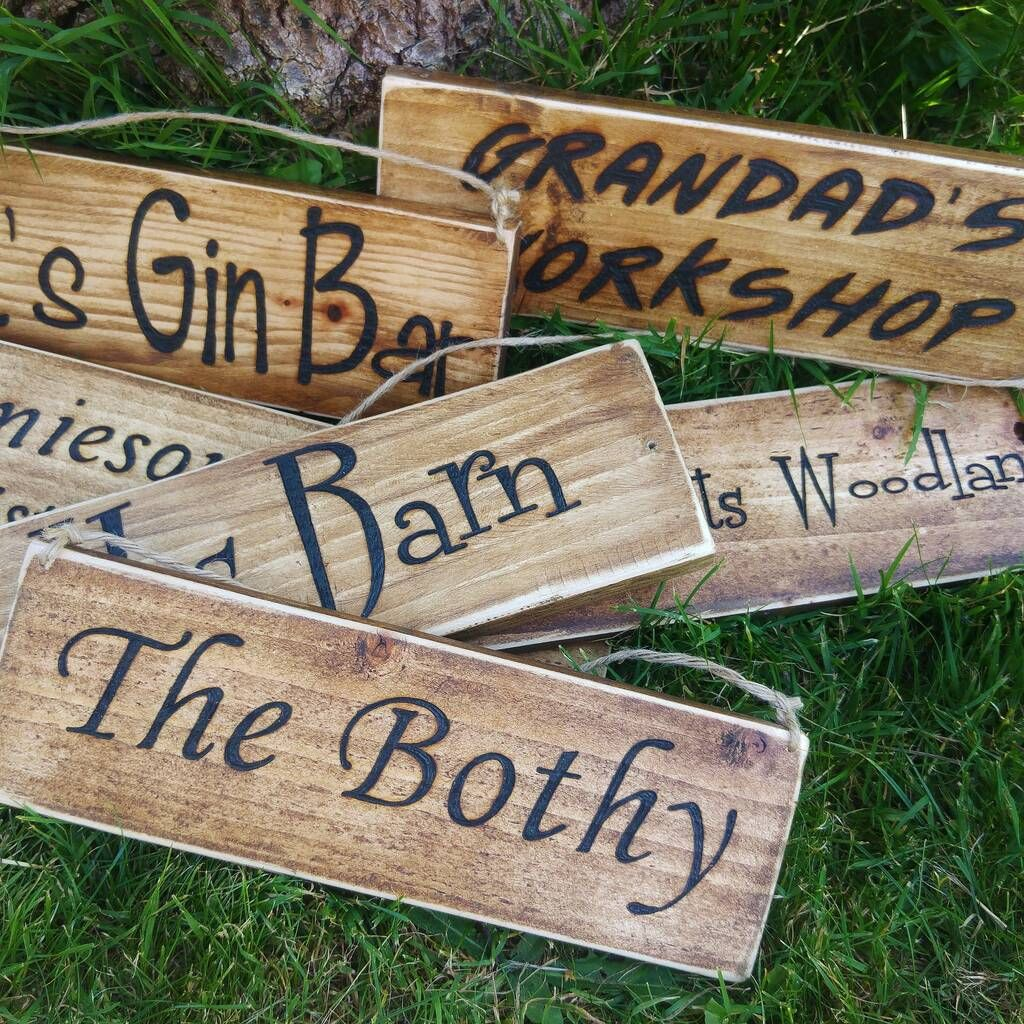
Why it matters: Small custom details like this are what make a yard look intentional instead of assembled from whatever was on sale.
How to do it: Cut reclaimed fence board or barn wood to size, stencil or wood-burn lettering, then seal with exterior polyurethane.
Pro tip: Wood-burning gives a more durable, weather-resistant result than paint for anything that’ll sit outside year-round — paint chips and needs redoing within a season or two.
23. Build a Simple Gravel and Paver Patio (No Concrete Required)
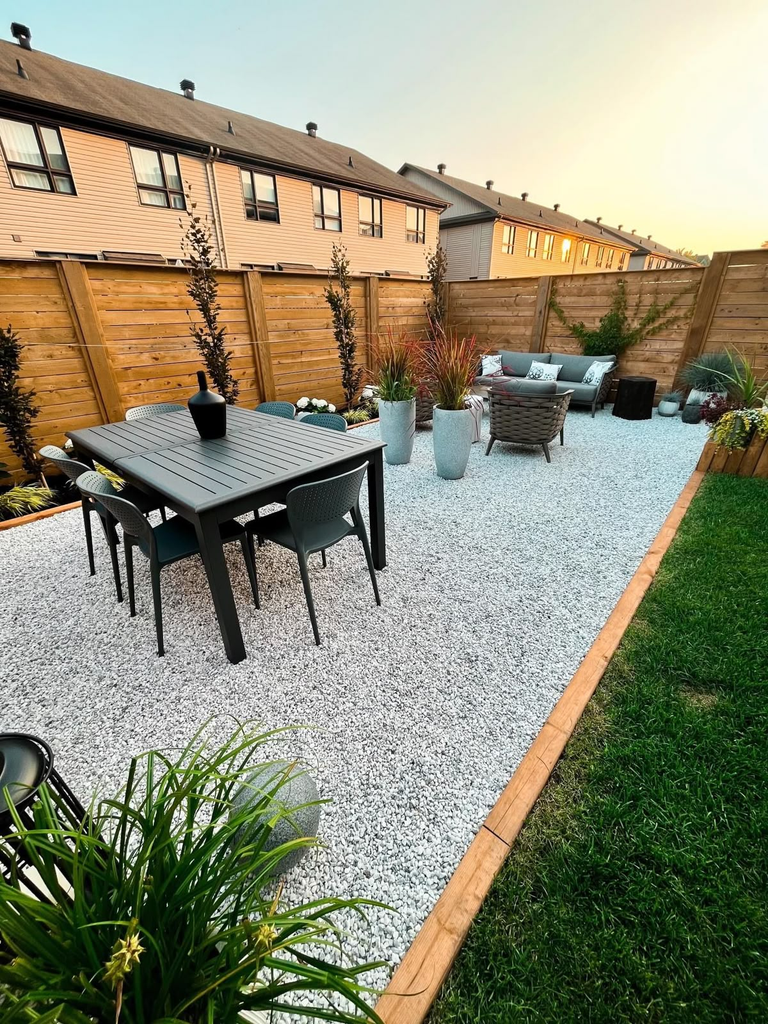
Why it matters: This is the project I’d point a total beginner toward if they wanted one real “patio” upgrade without pouring concrete, which is genuinely intimidating for a first project.
How to do it: Excavate the area about 4 inches deep, add a compacted gravel base, then set large-format pavers directly into the gravel, filling gaps with polymeric sand.
Trade-off worth knowing: This method isn’t quite as stable long-term as a full concrete-and-mortar patio and may need occasional relevelling after a few winters of freeze-thaw, but for a DIY first attempt, it’s dramatically more forgiving of small mistakes.
What I’d Actually Build First
If I were starting completely over with an empty yard, I wouldn’t start with the fire pit or the pergola, even though those get the most Pinterest saves.
I’d start with the fence stain and the string lights — both are a single weekend, both are close to instant gratification, and both change how the whole space feels before you’ve committed real money to anything bigger.
Once that’s done, the raised garden bed or the paver path is a natural next step, because by then you’ve got a feel for whether you actually enjoy this kind of project or whether you’d rather just buy the planter box next time.
Either way is fine. Not every project on this list needs to be DIY’d out of principle — some of them are just genuinely better use of a Saturday than others.




Leave a Reply