
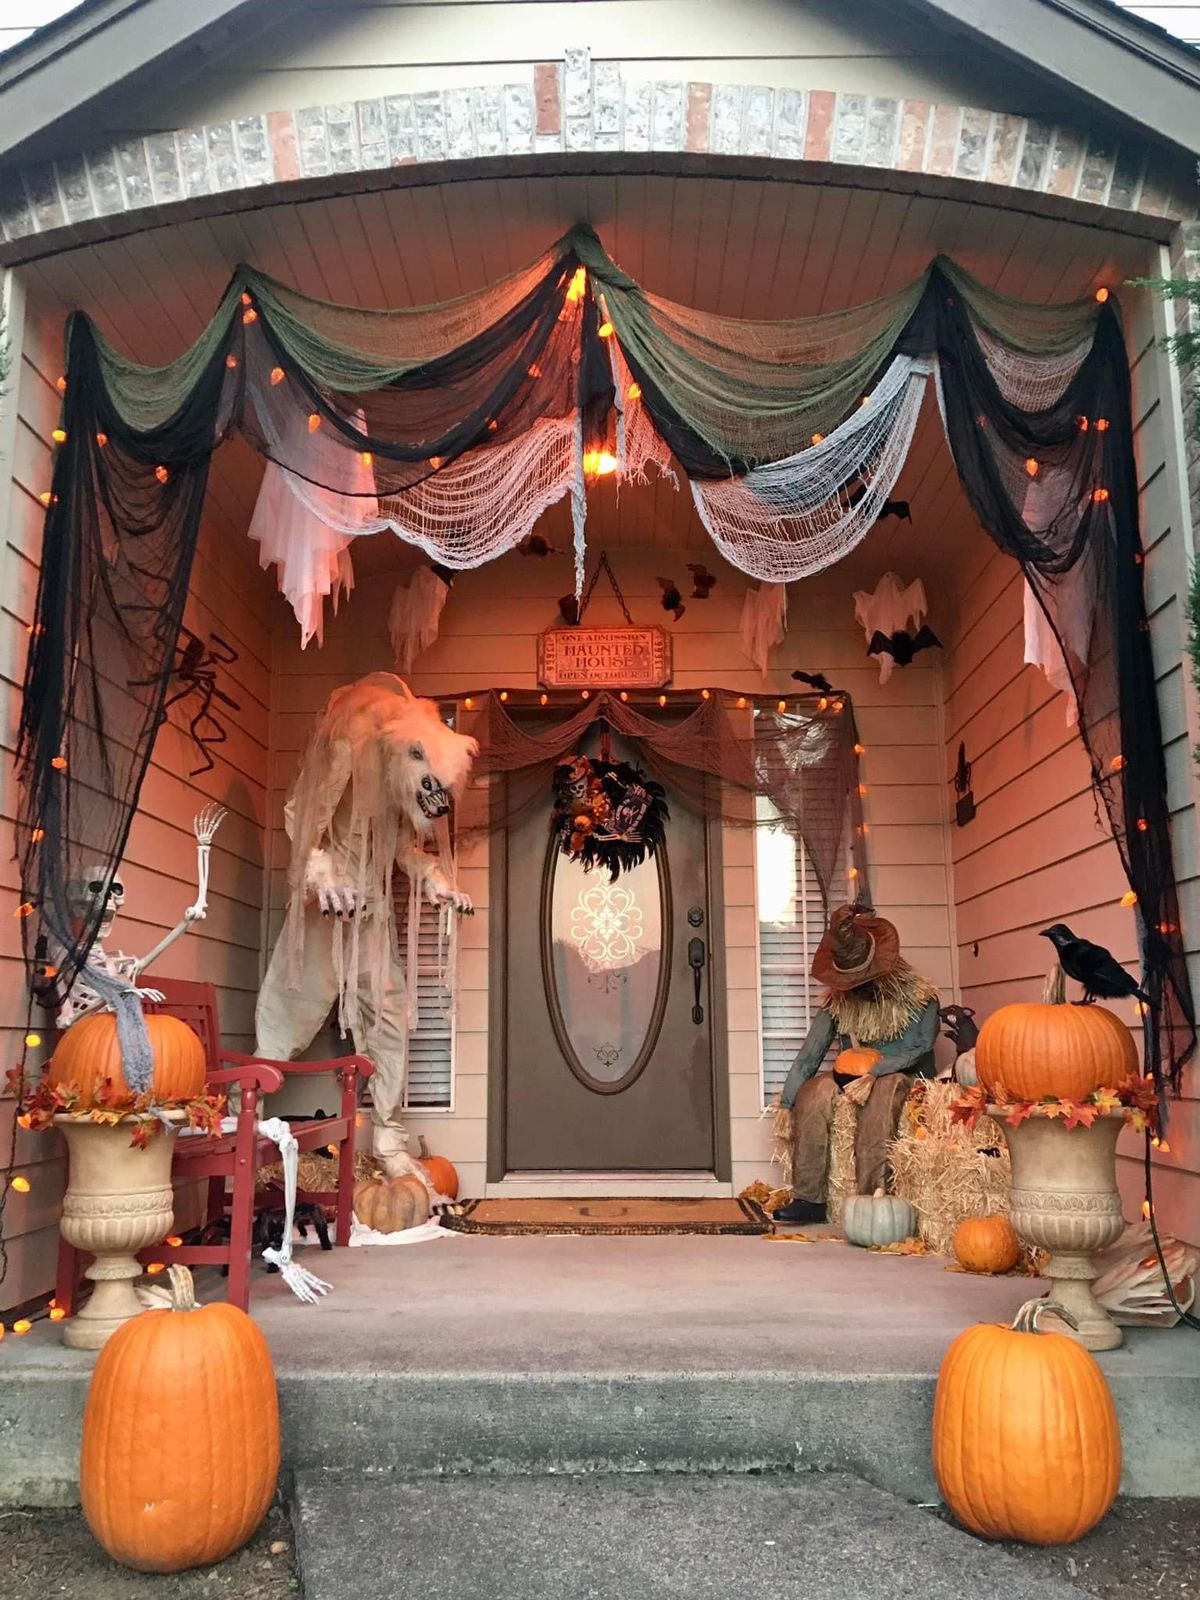
Two years ago I went full inflatable-everything on my front yard — a 12-foot skeleton, a light-up pumpkin arch, and a fog machine I found on clearance — and my next-door neighbor genuinely asked if I was “doing a haunted attraction for the neighborhood kids.”
I was not. I just didn’t know yet that Halloween yard decor has a tipping point where more stuff makes it look cheaper, not scarier.
So this list isn’t “buy all the inflatables.” It’s the porch and yard decorations that actually read as intentional — whether you want spooky-elegant, kid-friendly-cute, or genuinely unsettling — plus the specific mistakes I’ve made and watched other people make so you can skip them.
I’ve broken this into categories based on the look you’re actually going for, because “21 Halloween decorations” dumped in random order doesn’t help you if you’re trying to do a cohesive porch versus a full yard display.
Whatever budget or style you’re working with, there’s a real trade-off attached to almost everything on this list — what looks amazing in October and what quietly becomes storage-bin regret in November. I’ll flag both.
Classic Spooky Porch Decorations
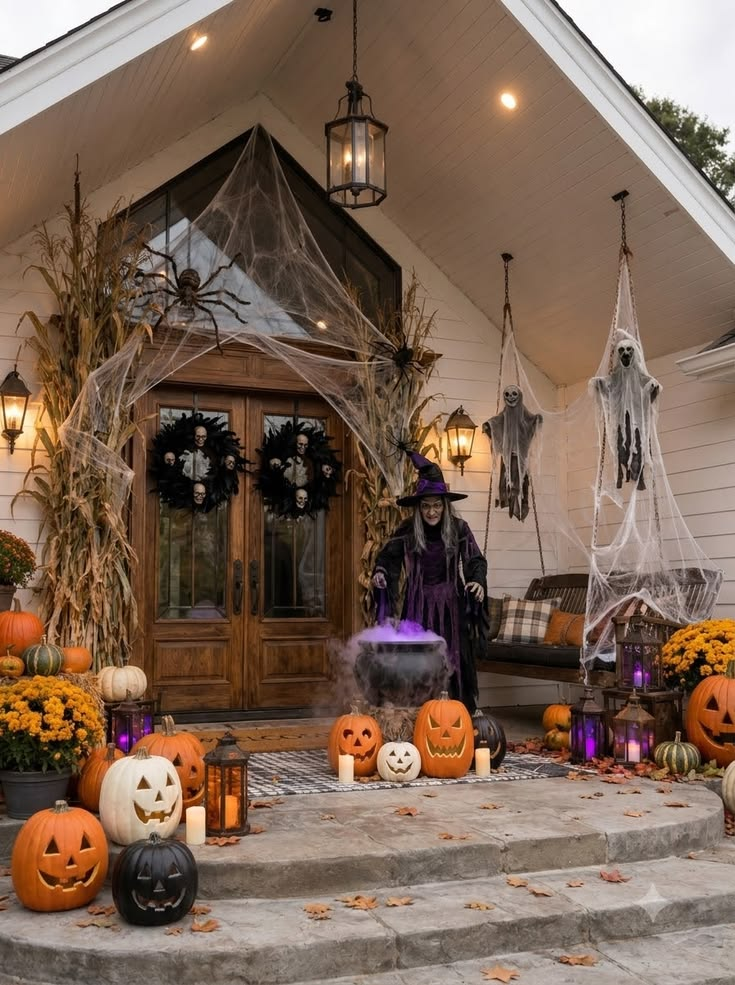
The stuff most people picture first — and where the biggest mistakes happen.
1. A single oversized pumpkin instead of five small ones
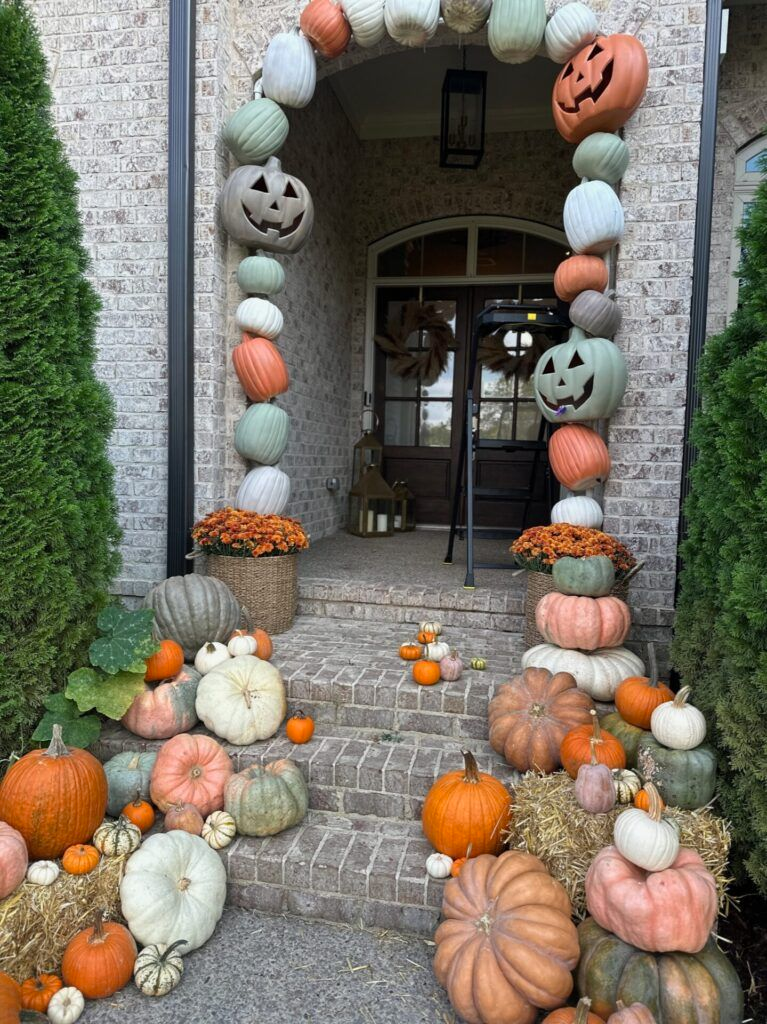
This is the “less but bigger” principle and it’s the fastest upgrade for a porch that looks scattered.
One 40+ pound pumpkin (real or a good foam replica) flanking your door does more visually than a cluster of small pie pumpkins that just read as leftover baking supplies.
My cousin Renata swears by the foam ones from a craft store now after a real one rotted into a sad puddle on her steps three days before Halloween.
Pro tip: If you’re going real, buy your porch pumpkin the week of Halloween, not at the start of October — heat and humidity will collapse a carved one in under a week.
2. Cobwebs applied thin, not clumped

Stretchy spiderweb material looks great in small, deliberate amounts across a railing corner or doorframe.
Clumped into a giant ball across your whole porch, it reads as “I bought the cheapest kit and dumped it out,” which — no judgment, we’ve all done it, but it’s an easy fix.
Pull it thin between your fingers before placing it, and anchor it in at least three points so wind doesn’t turn it into a single flapping mess.
3. Battery-operated lanterns in warm amber, not orange LED
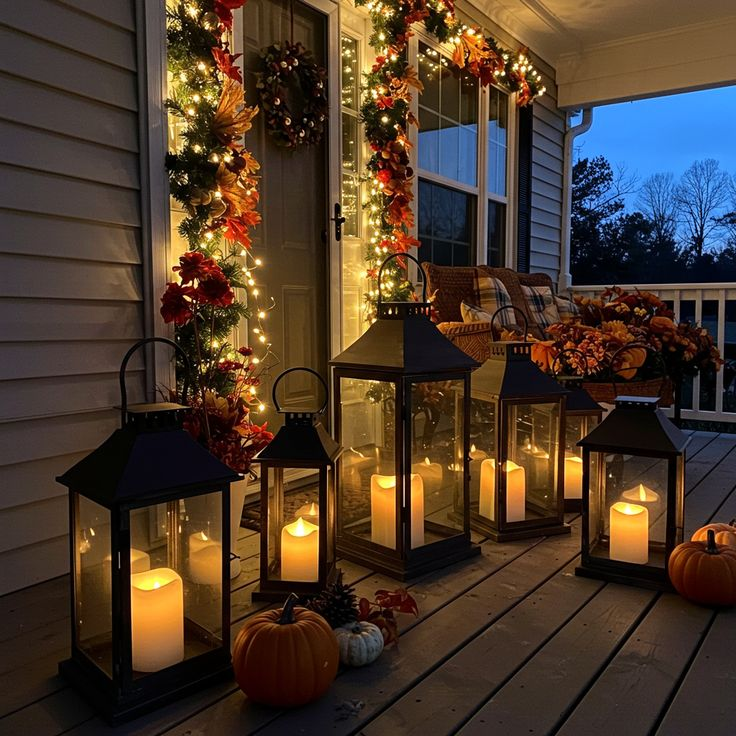
Orange LED lights read as “Halloween decoration.” Warm amber or flickering “flame” battery lanterns read as “atmosphere.”
It’s a small color-temperature difference that changes the whole feel, and it’s the one swap I’d tell anyone to make first if their porch currently looks more cartoonish than creepy.
4. A single realistic crow or raven, placed asymmetrically
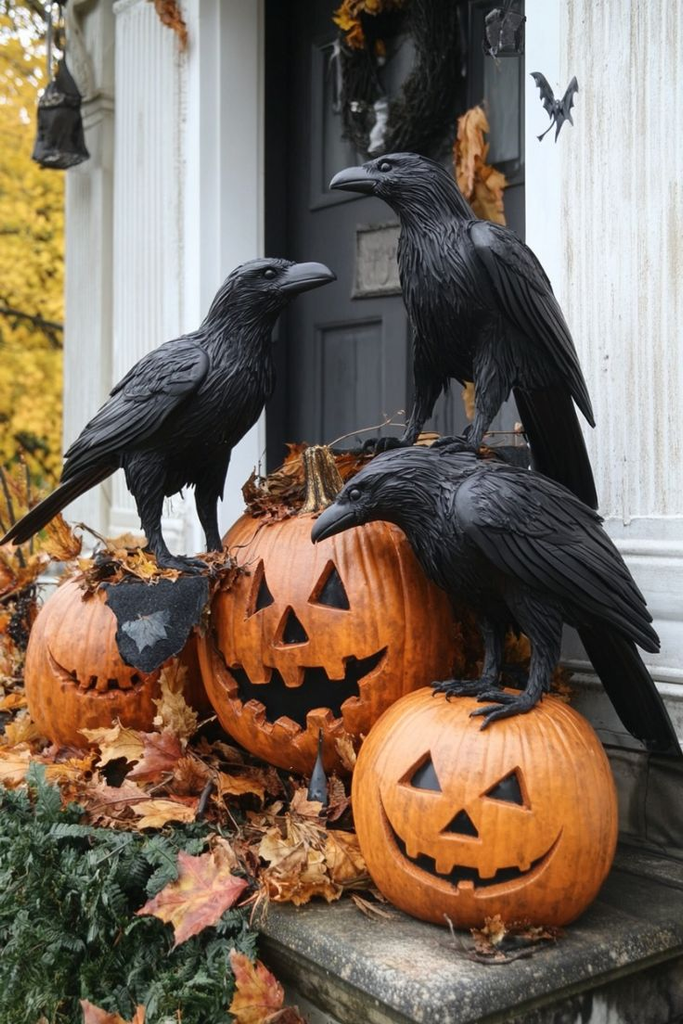
Not six identical plastic crows lined up like a fence. One well-placed crow on a lantern hook or railing post, slightly off-center, does more than a flock of matching ones.
Symmetry reads as “kit,” asymmetry reads as “found this here naturally,” which is the effect you actually want.
Budget-Friendly Halloween Decorations
You don’t need to spend $200 to make your yard feel like a decoration store threw up on it — in a good way.
5. Painted rocks as mini gravestones

If you’ve got landscaping rocks or river stones already sitting around your beds, a few coats of gray spray paint and stenciled “RIP” lettering turns them into a tiny graveyard for practically free.
It’s a project my sister does with her kids every year — total cost is maybe $6 in spray paint for a dozen rocks.
6. Dollar-store black plastic tablecloths as fabric draping

Instead of buying actual black fabric or a fog-effect drape, a couple of black plastic tablecloths cut into strips and layered work as a cheap “torn curtain” effect over a doorway or window.
It photographs surprisingly well in dim porch lighting, and it costs under $5 for materials that would run $20+ as actual Halloween fabric.
7. Repurposed cardboard tombstones from moving boxes
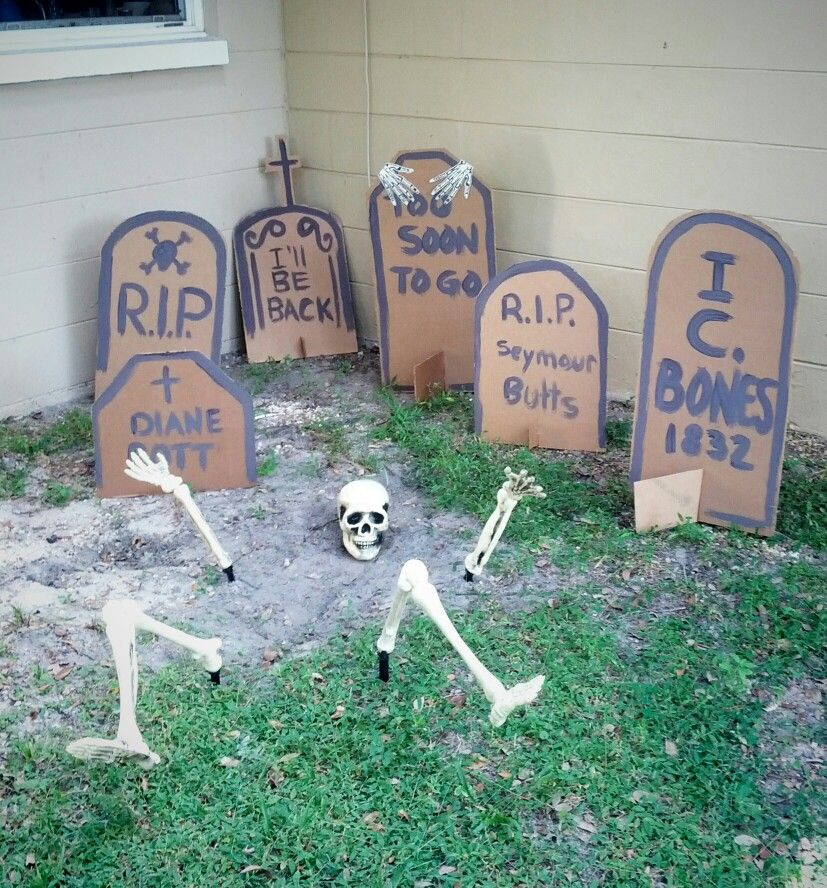
Cut tombstone shapes from flattened moving boxes, paint them gray with some drybrushed black for texture, and stick them into the ground with a wooden paint stirrer taped to the back.
I did six of these my first year for under $15 total in paint, and they held up through two seasons of light rain before the cardboard finally gave out.
Pro tip: Spray a coat of clear sealant over the cardboard before it goes outside — it roughly doubles how long it survives dew and light rain.
8. String lights repurposed from your regular holiday stash
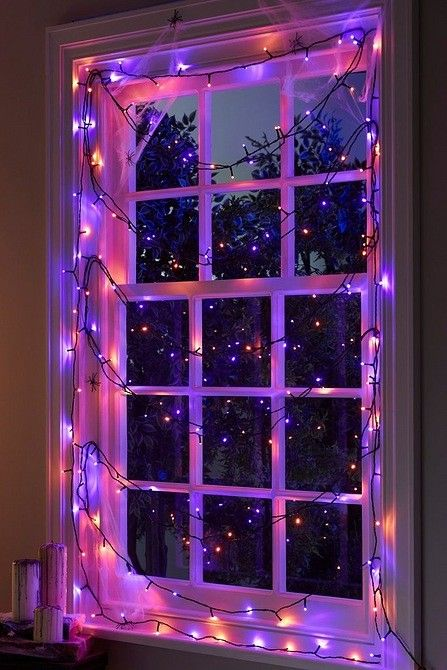
You don’t need Halloween-specific string lights. Orange or purple gel sleeves (a few dollars for a pack) slip over regular white string lights you already own for Christmas, instantly reading as Halloween without buying a whole new set.
Kid-Friendly & Trick-or-Treater Halloween Decorations
Spooky-cute instead of nightmare fuel, for houses that get a lot of foot traffic.
9. A well-lit, obstacle-free front path
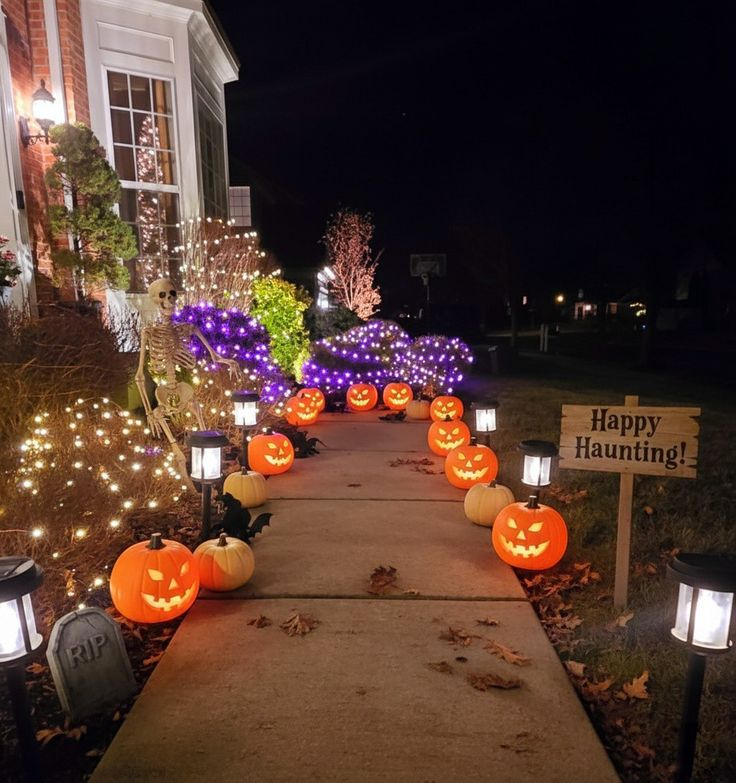
This sounds boring compared to decorations, but it’s the most-requested thing from actual trick-or-treating parents I’ve talked to — a walkway lit well enough that a kid in a bulky costume with limited visibility isn’t going to trip on your garden edging.
Solar path lights or a simple string of lights along the walkway edge solves this and it’s genuinely appreciated more than another inflatable.
10. A friendly ghost family instead of gore

White fabric ghosts of varying sizes (a foam ball head under a stretched pillowcase, tied with string) hung at different heights reads as charming rather than scary, and it’s a project you can do with kids in about twenty minutes.
11. A candy station that doesn’t require you standing at the door all night
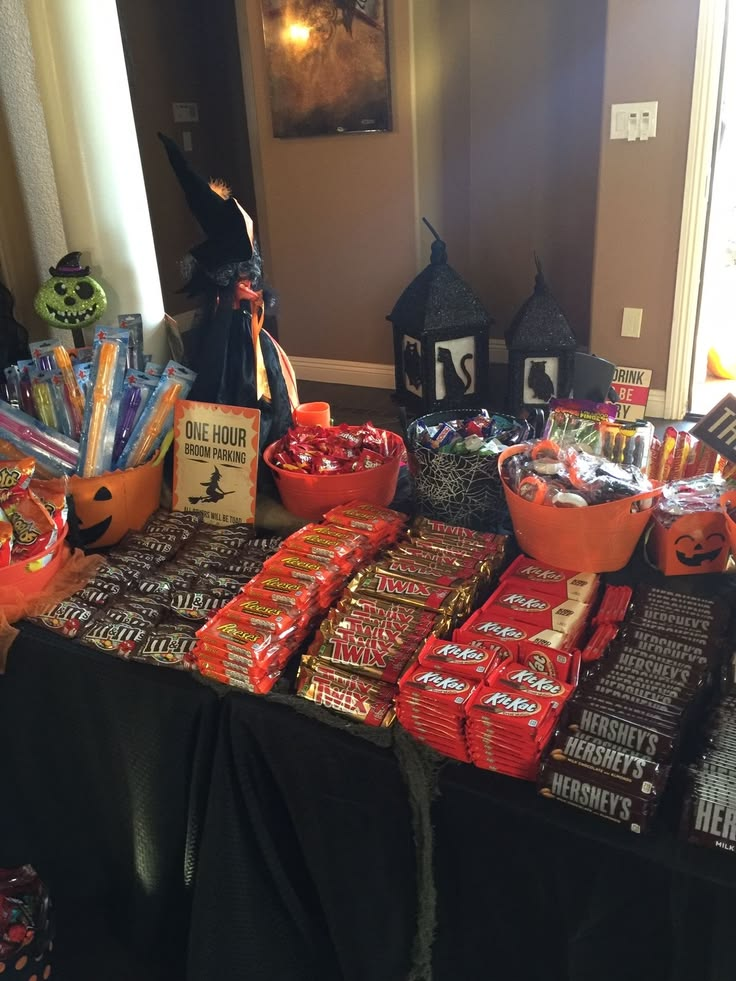
A small table or bench near your porch with a “please take one” sign and a motion-activated light frees you up to actually see costumes come by instead of playing doorbell duty for three hours.
Just know a bowl left unsupervised for the full night tends to get raided — a large bin refilled once around 7:30 works better than one big bowl at the start.
12. Character cutouts from your kids’ favorite movie, made from foam board
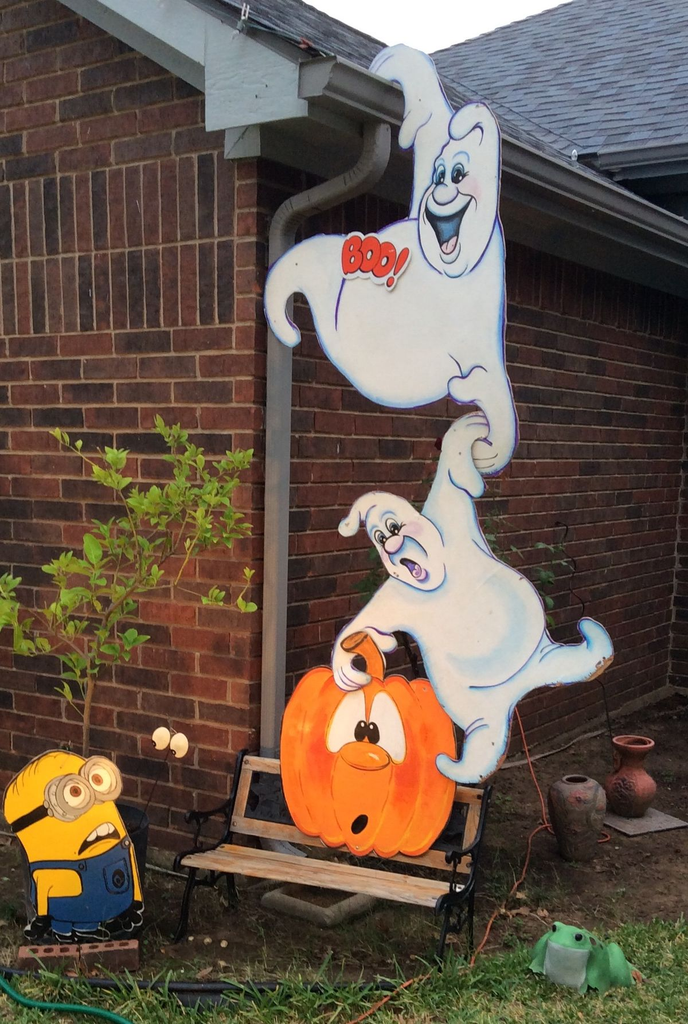
If your kids have a specific obsession this year, a couple of hand-cut character silhouettes from foam board (search a simple template online, trace, cut, paint) means way more to trick-or-treaters your kids’ age than another generic skeleton, and it costs less than $10 in board and paint.
Spooky-Elegant Halloween Decorations
For the “aesthetic Instagram porch” crowd — this is honestly the look with the highest search interest in my own Pinterest analytics for fall content, and it’s not hard to pull off.
13. A monochrome palette — black, white, and one accent color

Pick one accent (deep purple, blood red, or bone white) and keep everything else black or natural wood tones. This is the single biggest thing separating a porch that looks “curated” from one that looks like a costume aisle — random color combinations (orange AND purple AND green AND black) read as kids’ party, not elegant.
14. Dried florals and pampas grass mixed into pumpkin displays
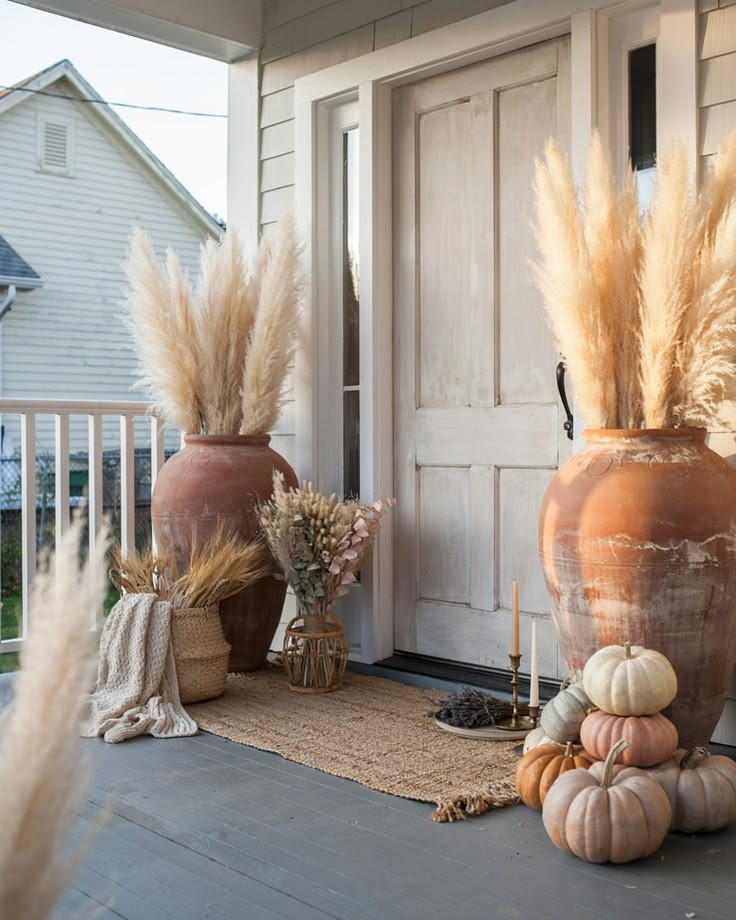
Adding dried hydrangea, wheat stalks, or pampas grass into your pumpkin arrangement bridges it into a fall display that doesn’t scream “Halloween specifically,” which matters if you want your porch to transition smoothly from October 1st through Thanksgiving without a full teardown.
15. Taper candles in mismatched vintage-style holders

A cluster of black or ivory taper candles (battery-operated for actual outdoor safety) in a few different holder heights on porch steps reads expensive and intentional. This is a look with real traction on my own Pinterest board this season — the “gothic candlelit porch” pin style has been one of my higher-performing fall saves.
16. Draped black or charcoal fabric instead of plastic tablecloths

If you’ve got the budget past the dollar-store version above, actual cheesecloth or lightweight black fabric draped over a porch railing or doorway arch, weighted at the ends so it doesn’t blow around, looks genuinely high-end for under $25 in fabric.
Comparing Halloween Decoration Styles by Cost and Effort
Here’s roughly how the main directions stack up if you’re deciding where to put your time and money this year.
| Style | Typical Cost | Setup Time | Best For |
|---|---|---|---|
| Classic spooky (cobwebs, crows, jack-o-lanterns) | Low-moderate | 1-2 hours | Most houses, easy to scale up or down |
| Budget/DIY (cardboard, painted rocks, repurposed lights) | Very low | 2-4 hours (mostly making, not placing) | Families, kids’ projects, first-time decorators |
| Kid-friendly/trick-or-treat focused | Low-moderate | 1-2 hours | High foot-traffic streets |
| Spooky-elegant/aesthetic | Moderate-high | 2-3 hours | Porches that stay decorated through fall, not just one night |
| Full yard/inflatable-heavy | High | 3-5 hours | Big yards, people who genuinely love the full display |
I lean spooky-elegant on the porch itself and keep the kid-friendly stuff in the yard where trick-or-treaters actually interact with it — the two zones don’t have to match perfectly, and honestly they shouldn’t if you’re trying to do both well.
Bigger Yard Display Ideas (For When You Want to Go Further)
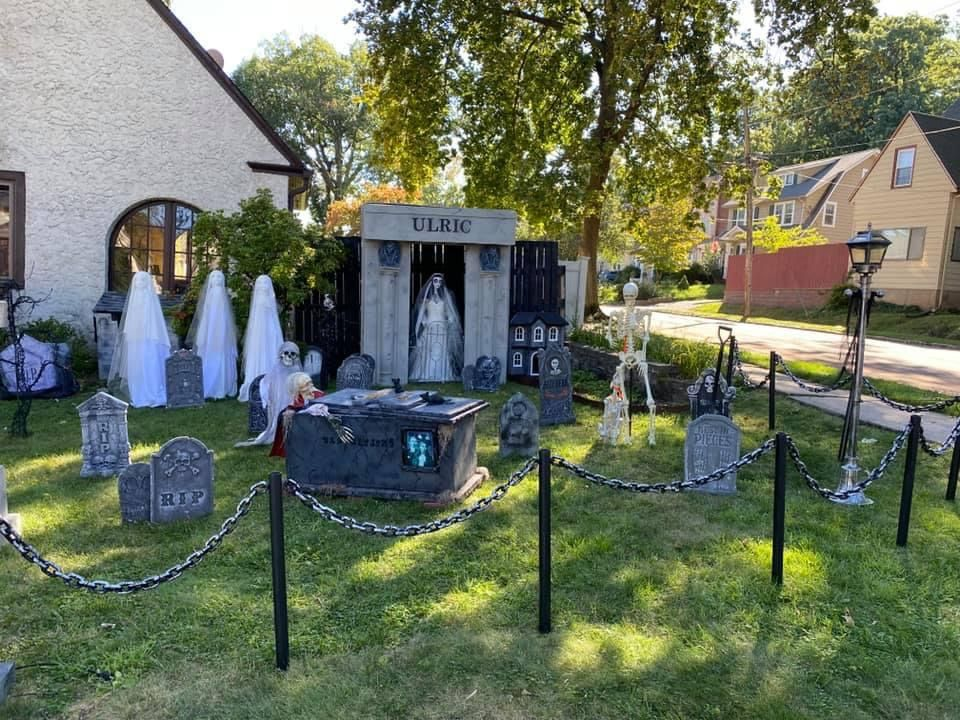
17. A DIY graveyard scene with staggered tombstone heights

Beyond the cardboard version above, if you want a more substantial yard graveyard, foam tombstone kits ($15-25 each) placed at staggered heights and angles — not in a straight line — look far more convincing than a neat row. Angle a few slightly, like they’ve settled into the ground over time.
18. Fog effect using dry ice instead of a fog machine
A cooler with dry ice and warm water gets you low-lying fog for a fraction of what a fog machine costs, and it hugs the ground in a way that actually looks more like classic horror-movie fog than a machine’s output does.
Dry ice needs handling with gloves and shouldn’t be used in enclosed spaces — it’s an outdoor-only trick.
Pro tip: Buy dry ice the same day you need it. It sublimates (evaporates) even in a cooler, so buying it a day early means you’re paying for ice you won’t actually get to use.
19. Motion-activated sound effects hidden in bushes

A cheap motion-sensor speaker tucked into foundation planting, playing low creaking or whispering sounds rather than a jump-scare scream, adds atmosphere without startling small kids off your walkway entirely.
Scream effects are genuinely a bad idea if you want repeat trick-or-treaters — I learned this from a reader comment on an earlier post, and it’s stuck with me since.
20. A carved pumpkin display with a lighting plan, not just candles

Group 4-6 carved pumpkins at varying heights on a stand or steps, and use a mix of warm LED tea lights (safer than open flame with kids and pets around) with at least one taller pumpkin lit from below for shadow effect. The height variation matters as much as the carving itself for how the whole grouping photographs.
21. A “before and after dark” plan for your whole display
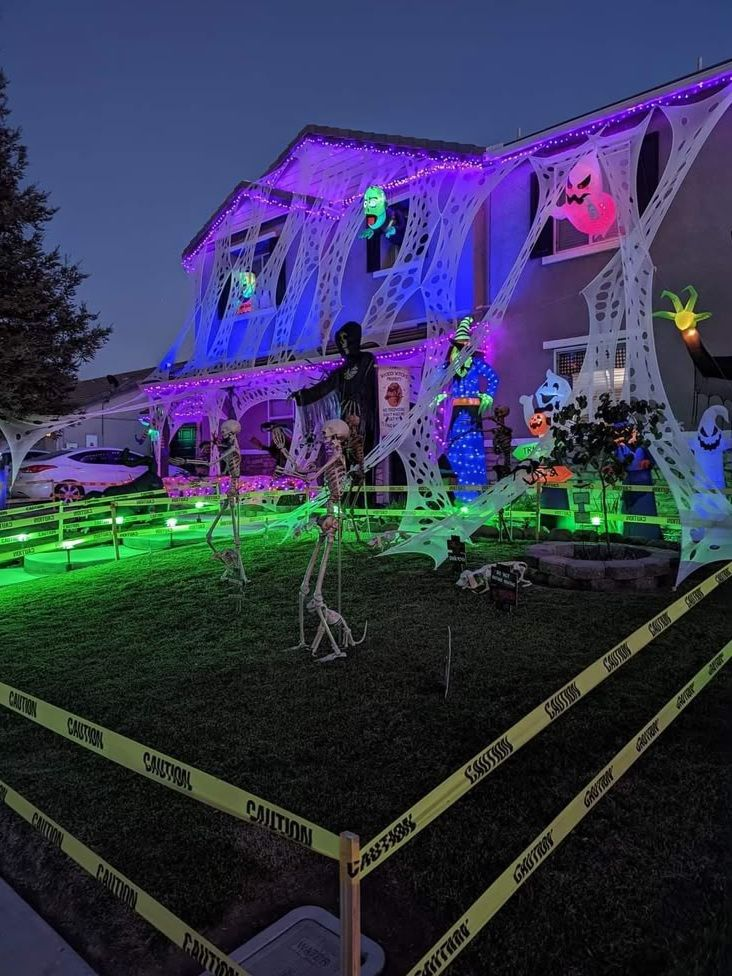
The mistake I made my first big-display year: everything looked incredible in daylight photos and then went nearly invisible once the sun actually went down, because I hadn’t planned for evening lighting at all — just decorations.
Walk your display after dark before the 31st and add lighting anywhere it goes flat; string lights, spotlights, or even a couple of solar path lights redirected toward a display piece fix this in under 20 minutes.
What This Actually Costs
If you’re budgeting the whole thing out: the DIY and dollar-store category above gets you a legitimately good-looking porch for under $30 total. Add another $50-75 if you want a couple of real foam tombstones and quality string lights instead of gel sleeves.
The full yard display with fog, sound effects, and a proper graveyard scene is realistically a $150-250 investment once you count tombstone kits, a fog setup, and outdoor-rated lighting — but most of that is reusable for years, so the cost-per-year drops fast if you’re not buying it all from scratch again next October.
Where I’d Start If I Were Doing This Over
The lighting swap — warm amber instead of orange, and actually walking my display after dark before Halloween night. Everything else on this list is optional depending on your style and how much time you want to spend, but bad lighting undoes good decorations faster than anything else, and it’s also the cheapest fix on the entire list. Get that right first, then layer in whichever category above actually matches the vibe you’re going for.


Leave a Reply